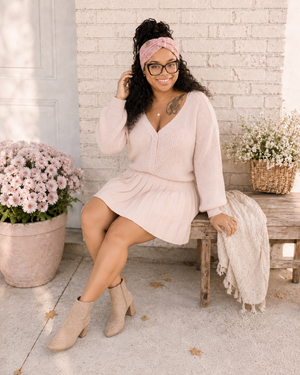
Summer at the Beach Crochet Blanket Pattern
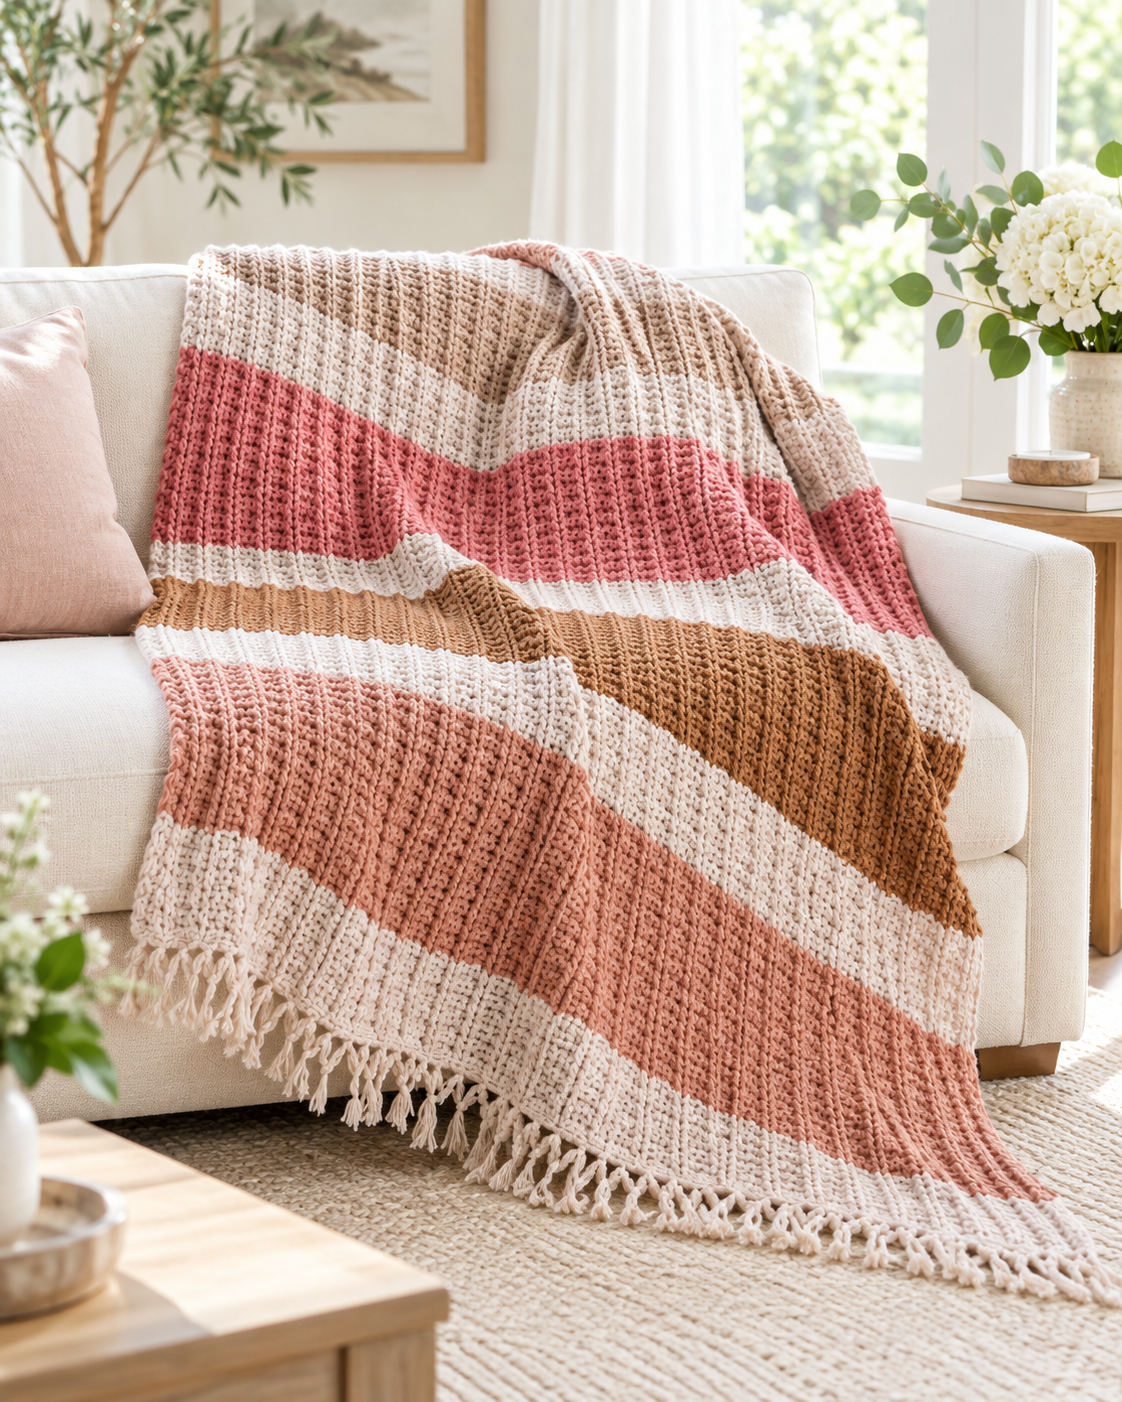
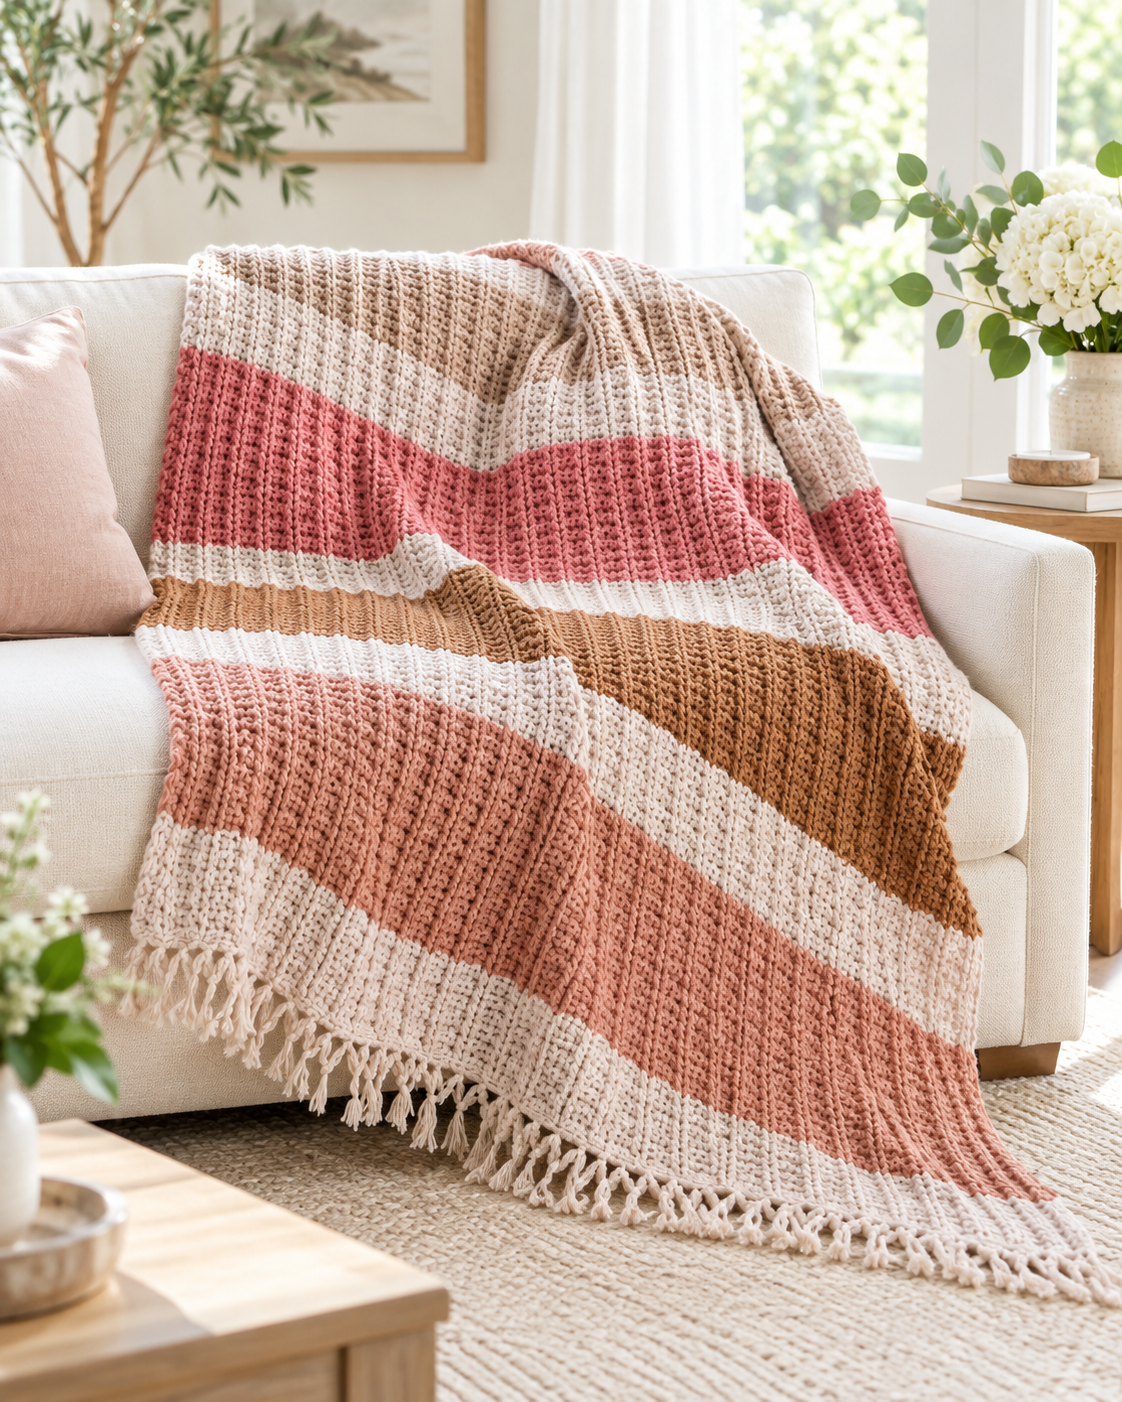
The Summer at the Beach Crochet Blanket is a textured, boho-inspired crochet blanket featuring front post twisted cable and soft blocks of color. The blanket is worked flat from the bottom-up. Alternating front-post and back-post stitches to create the raised texture, while neutral separator sections break up the larger blocks of color. The pattern comes with 2 sizes baby and throw.
Disclaimer
This pattern is for professional use only. No part of this pattern maybe copied, reproduced, translated, distributed, sold, or shared in any form without written permission from JusBeeCreations Crochet Designs. You are welcome to sell finished handmade items created from this pattern in small quantities. Please credit JusBeeCreations Crochet Designs as the pattern designer.
Affiliate Disclosure
This post may contain affiliate links. If you make a purchase through one of my affiliate links, I may receive a small compensation at no additional cost to you. Thank you for supporting JusBeeCreations Crochet Designs and allowing me to continue sharing crochet patterns and tutorials.
Behind the Design
When I designed the Summer at the Beach Crochet Blanket, I wanted something that felt warm, relaxed, and a little bohemian while still having enough texture to make the blanket interesting to crochet. The combination of earthy and soft colors allows the cable texture to stand out without making the finished blanket feel to busy.
Although the original uses of Buff, Dusty Peach, Nutmeg, Pink, Sand, and Soft Pink, this design would work beautifully in coastal blues, warm neutrals, terracotta shades, or even one solid color.
Pattern at a Glance
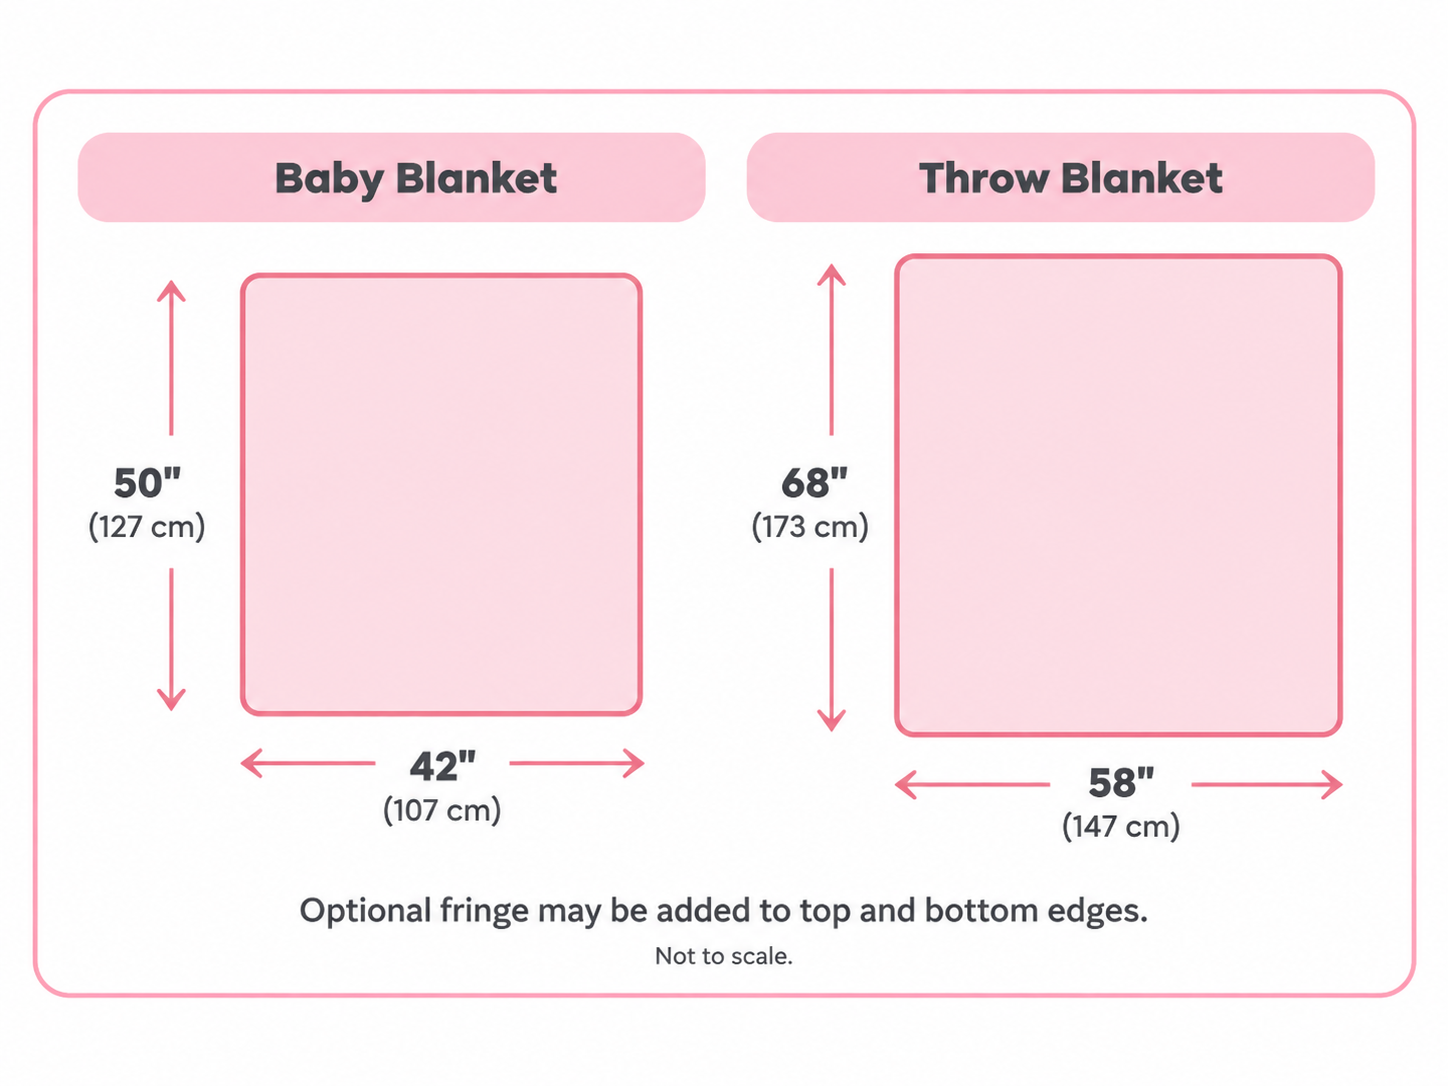
This pattern includes Baby and Throw Sizes, with finished measurements of approx. (42"x 50")/(58"x 68"). The color palette is boho inspired using the colors Buff, Dusty Peach, Nutmeg, Pink, Sand, and Soft Pink,creating the boho vibes. Once the blanket is complete, it can be finished with the decorative knotted fringe for extra texture, or left without fringe for a cleaner simpler finish.
Why you’ll Love this Pattern
The Summer at the Beach Crochet Blanket is a cozy, textured project that combines a soft boho color palette with beautiful cabled-style stich-work. The repeating post stitch pattern creates plenty of visual interest while still settling into an easy rhythm once you get going.
You’ll love that the pattern includes both Baby and Throw sizes, making it easy to create a smaller gift blanket or a larger statement piece for your home.
The design is also easy to personalize. You can follow the original color palette, or switch the colors to match your own décor and style.
The optional fringe gives the finished blanket an extra boho touch, but you can leave it off for a cleaner look. The combination of texture, color changes, and finishing details makes this a satisfying project for an intermediate crocheter who wants something both decorative and functional.
Yarn & Materials
For the blanket I used Mary Maxims Mellow Spun Dk weight #3 yarn. The color palette chosen was intended to create a boho-inspired look, which was perfect because this yarn line has so many colors to choose from. Buff is used as the main color through-out the the design, while the remaining shades to create the larger color-blocked sections. The mix of soft pink, warm browns, and neutrals allows the raised post-stitch texture to stand out without overwhelming the overall look.
Colors Used:
MC/ A- Buff
B- Dusty Peach
C- Nutmeg
D- Pink
E- Sand
F- Soft Pink
DK Weight #3
100% Acrylic
284 yards/ 100 g ball
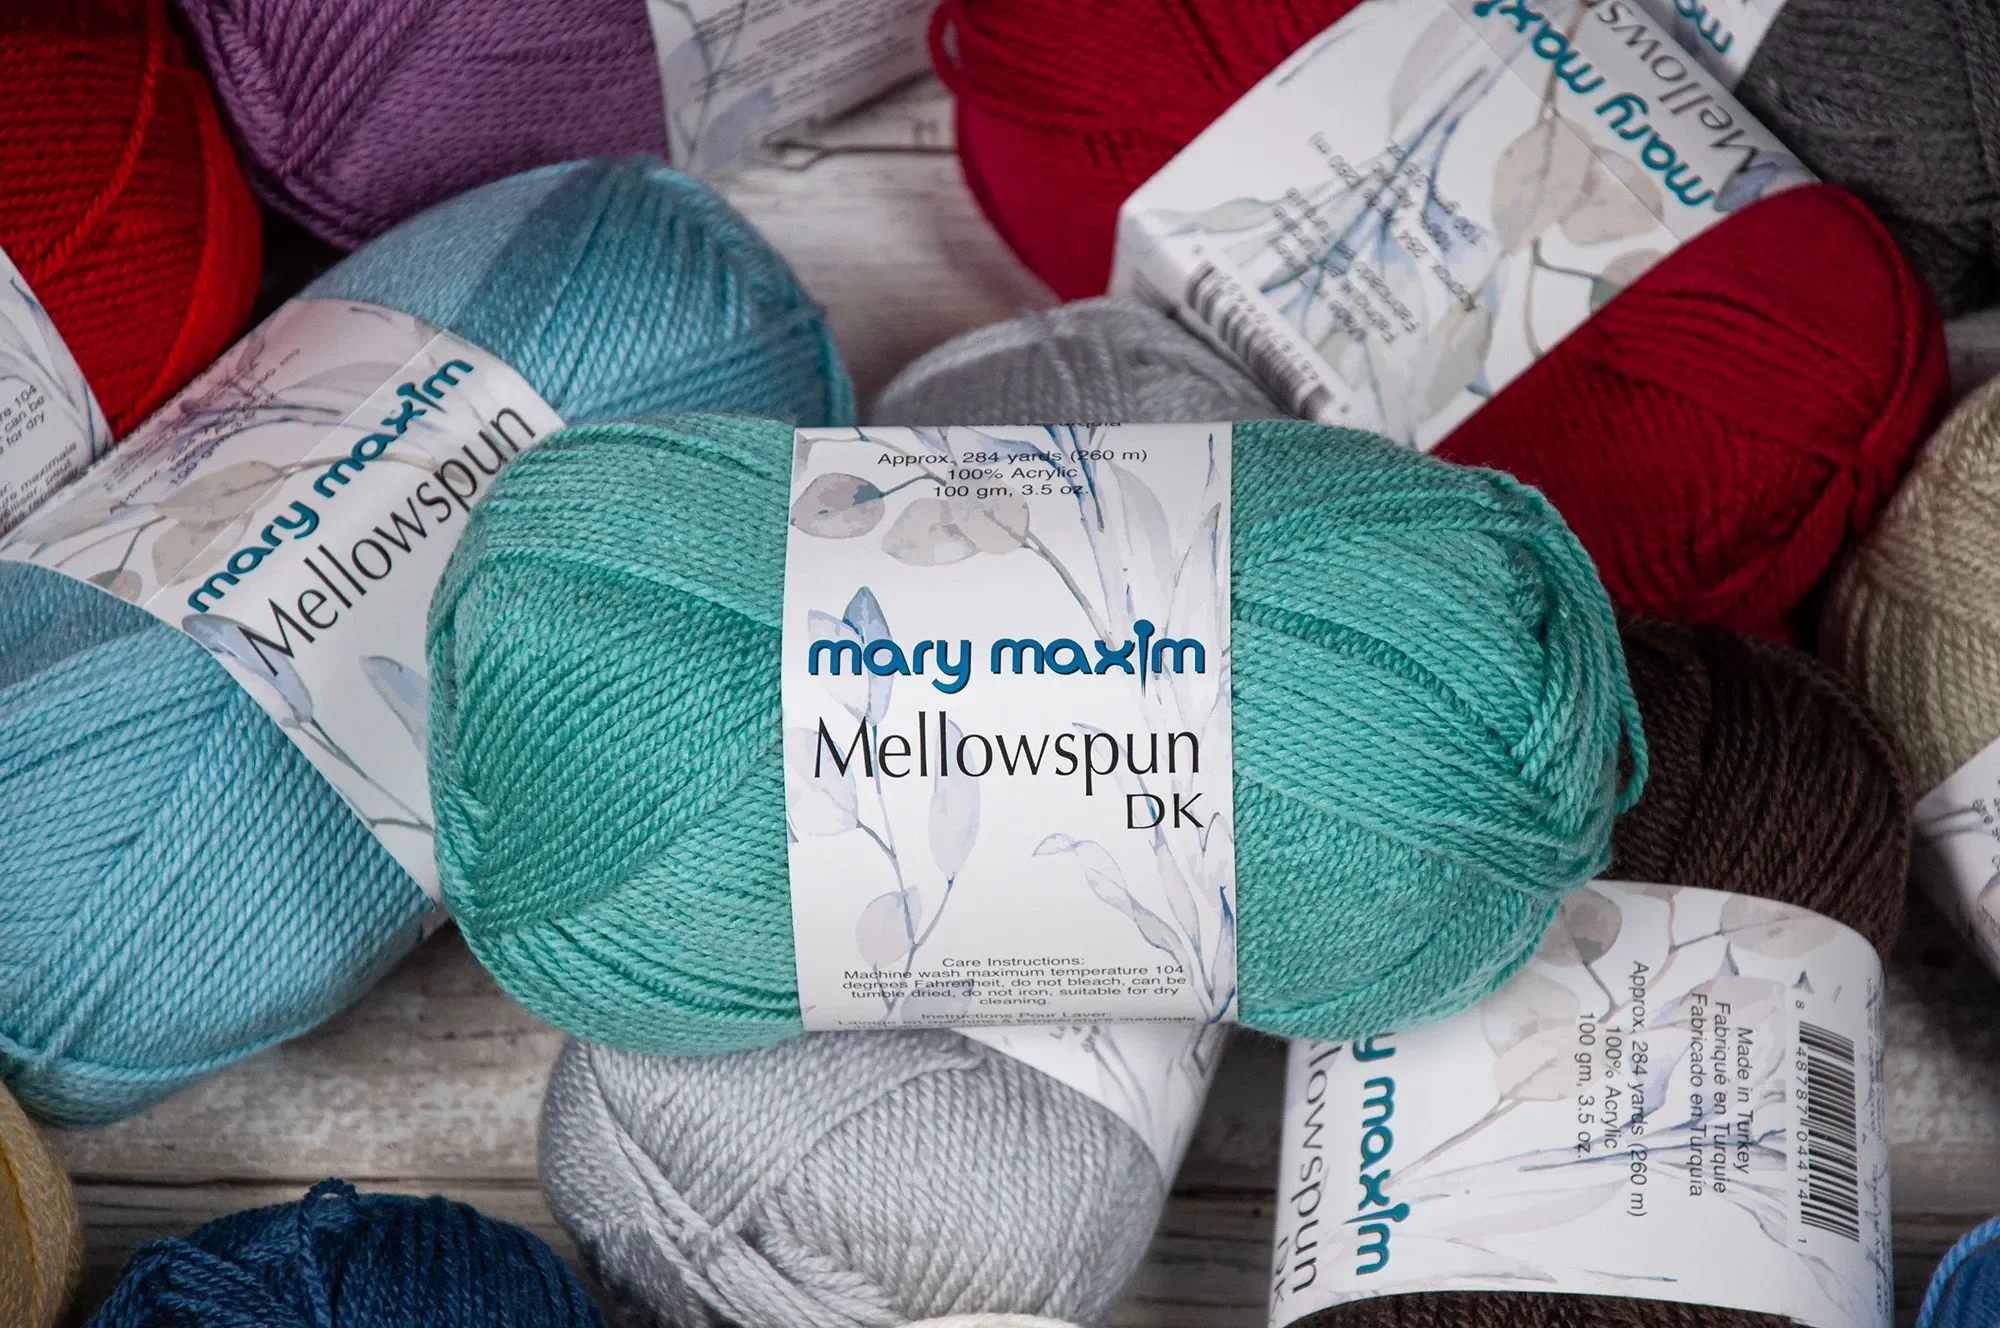
Mary Maxim Mellow Spun DK
1,420 yds
1,704 yds
284 yds
568 yds
284 yds
568 yds
284 yds
568 yds
284 yds
568 yds
284 yds
568 yds
Fiber: 100% Acrylic
Yardage: Approx. 306 yds per ball
A great substitute when you want a similar lightweight feel, soft drape, and good stitch definition for the cable texture.
Fiber: 100% Acrylic
Yardage: Approx. 273 yds per ball
A beautiful option if you want excellent stitch definition and a polished, anti-pilling finish.
Fiber: 100% Acrylic
Yardage: Approx. 360 yds per ball
A budget-friendly alternative with generous yardage that works well for larger crochet projects such as blankets.
Hook Requirements
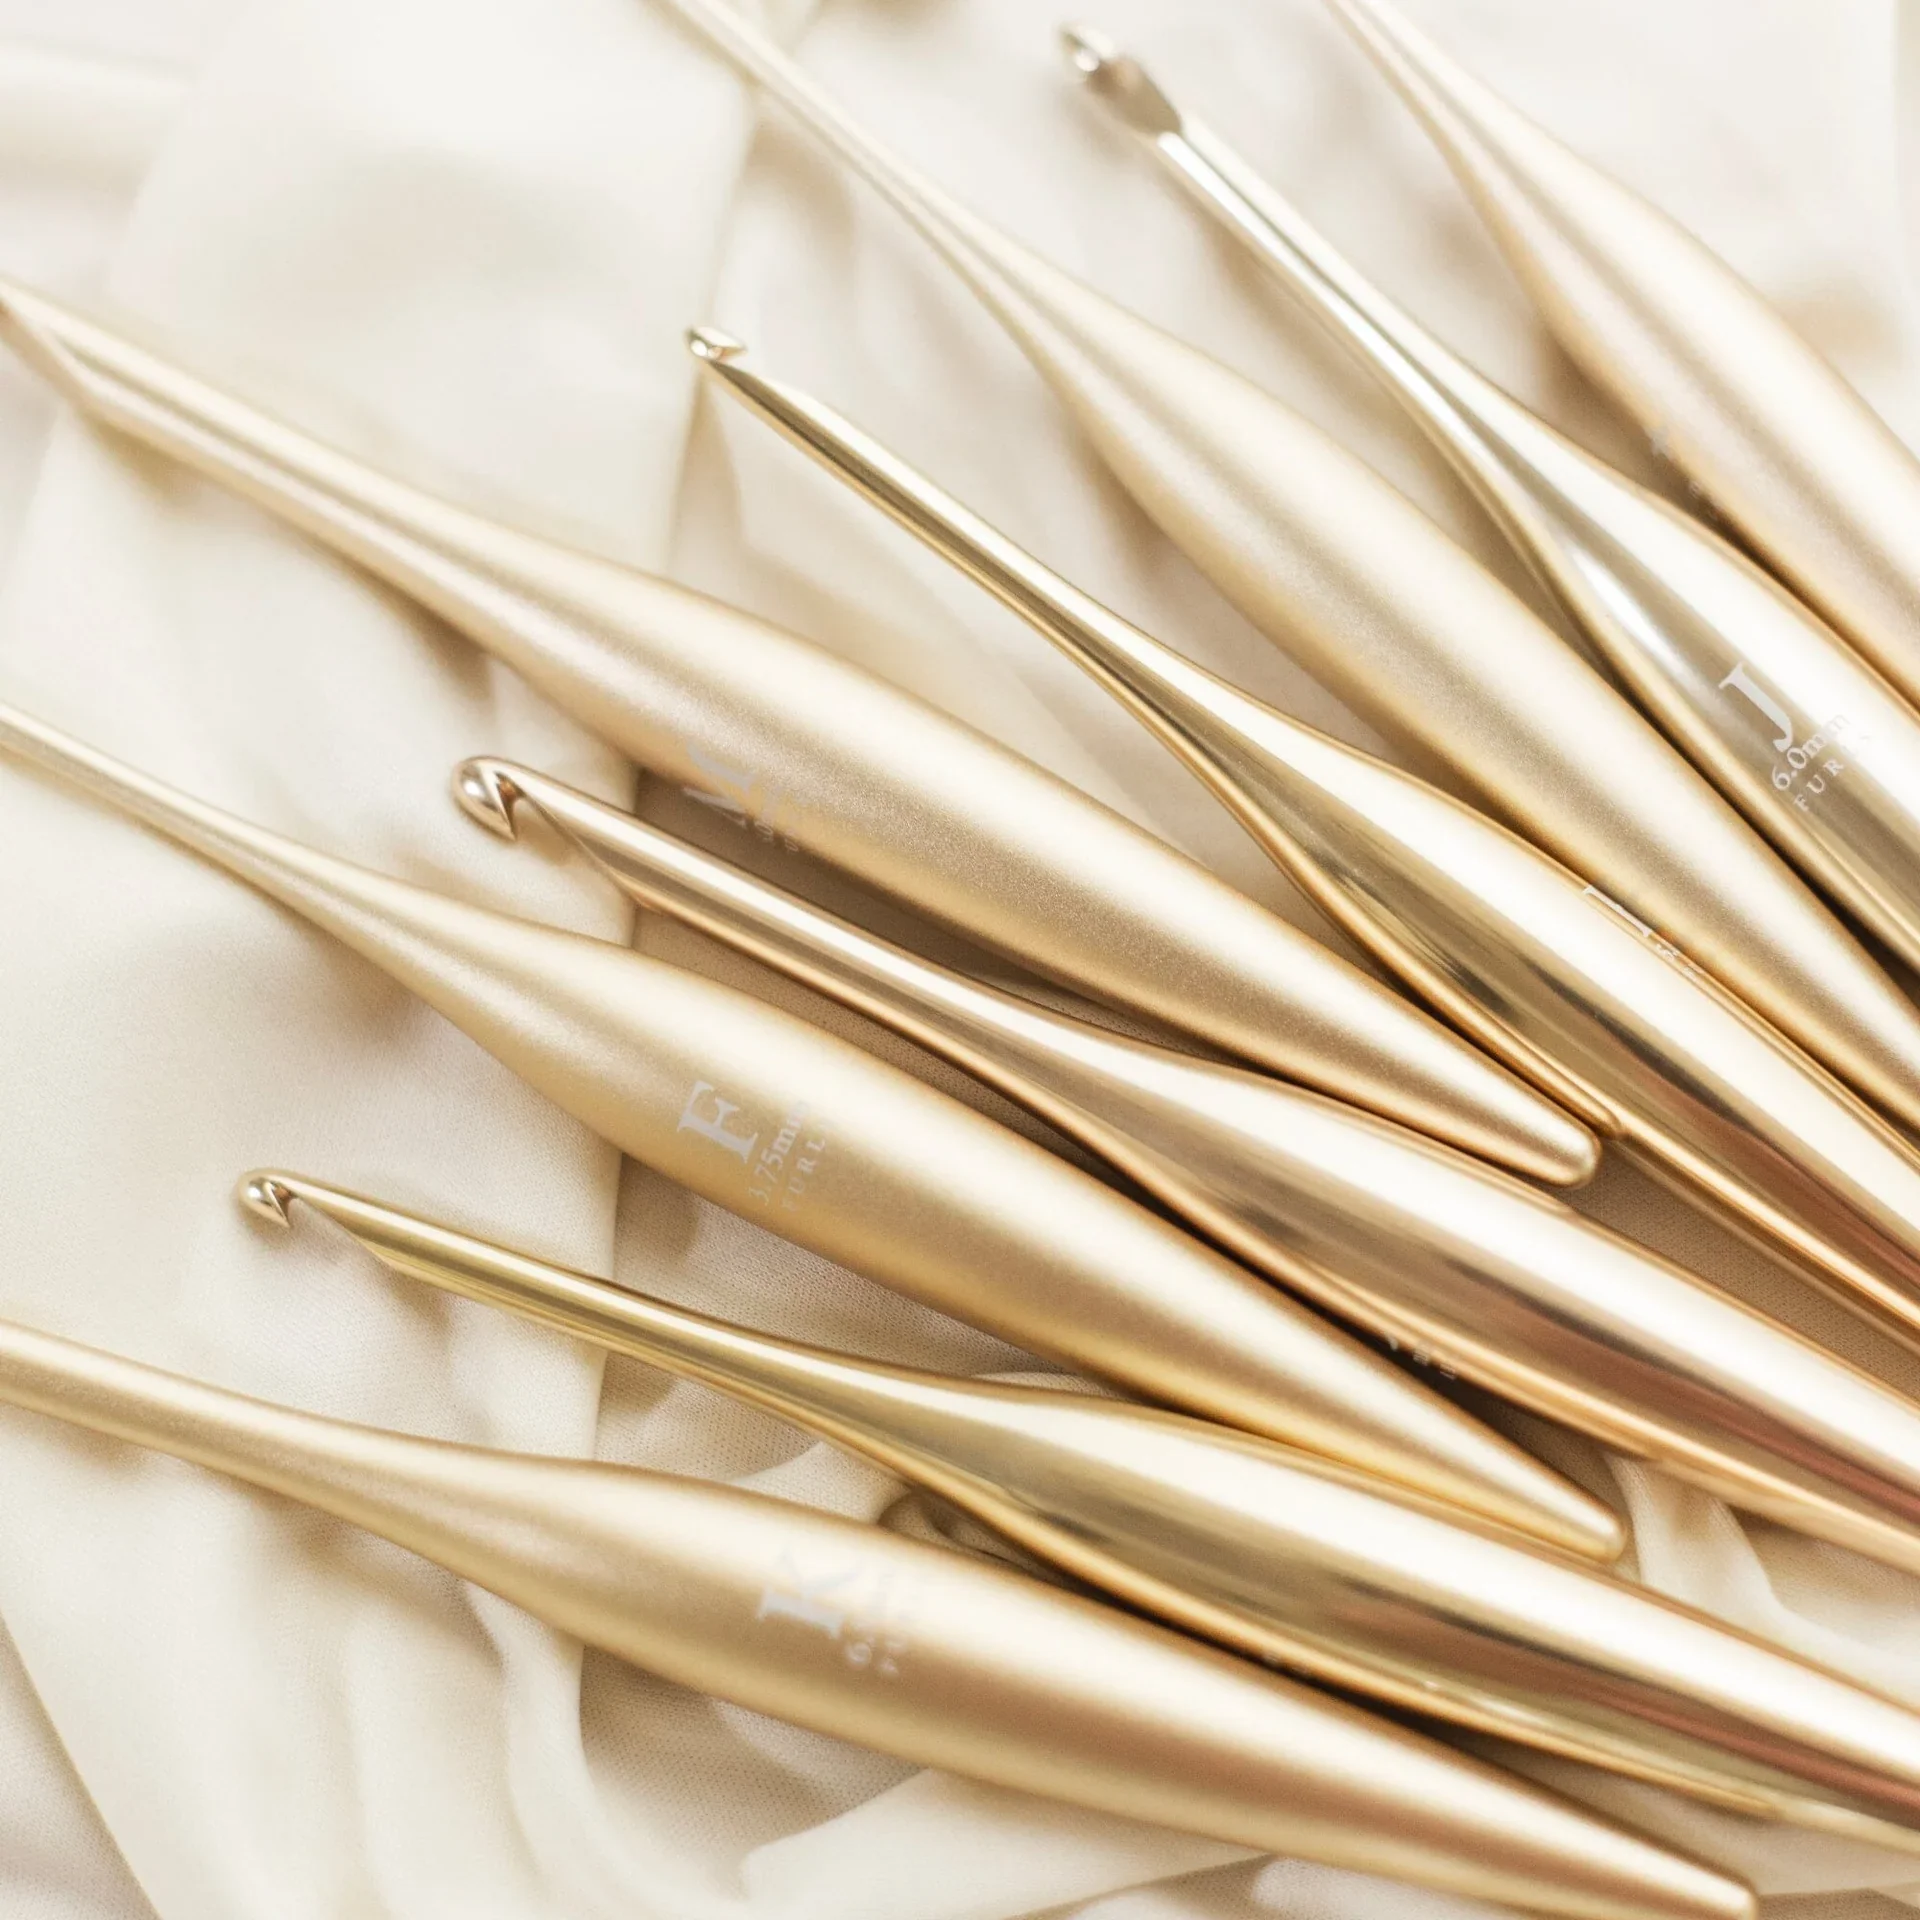
Furls Crochet Gold Streamline
Metal Hook 5mm (H)
Supplies
Stitch Markers
Yarn Needle
Scissors
Measuring Tape
Blocking Mats
Blocking Pins
Steamer/ Optional
Garment tags/ Optional
Gauge
Gauge is important in this pattern because both the width and finished length are calculated from it. Make a gauge swatch using the cable repeat before beginning.
4 sets of 3 and 13 rows = 4”
12 sts and 13 rows = 4” in established cable pattern using 5.0mm (H) hook.

MORE CROCHET • MORE INSPIRATION
Join the JBC Crochet Circle
Become part of the JBC Crochet Circle and enjoy a cozy space created for crocheters who love patterns, helpful resources, creative inspiration, and a few special extras along the way.
Already a member? Sign in to visit your Crochet Circle member area.
JOIN THE JBC CROCHET CIRCLESizing
The pattern comes in Baby-Throw size. If you want to change the sizing, without having to change the pattern I suggest going up a larger hook size for a larger blanket or smaller hook for a smaller size blanket. This will work perfectly if you do not feel comfortable changing the sizing. If you choose to change the pattern be sure to read through the pattern notes for the detailed explication of the stitch pattern and multiple this pattern requires.
Schematics
Pattern Notes
The blanket is worked from the bottom up. Turn after every row. The SSC counts as the first dc of each row. Do not work another stitch into the same stitch after making the SSC unless specifically instructed. Pattern sizes indicated as (baby/throw) in the pattern. The cable pattern is a 2-row repeat consisting of one RS cable row and one WS return row. All color sections contain an even number of rows so that each new color begins on a RS row. Change color during the final yarn-over of the final stitch of the WS row immediately before the new color begins.
Construction
The Summer at the Beach Crochet Blanket is worked flat from the bottom up in turned rows. A repeating 2-row pattern of front post and back post dc sts creates the raised texture, while Buff separates the larger color sections. Once the body of the blanket is complete, finish with a sc row, block to size, and add the optional knotted fringe along the top and bottom edges.
Abbreviations
This pattern is written using standard US crochet terminology.
Note: Any special stitches used in the pattern are explained separately in the Special Stitches section.
Get the Pattern
Not a fan of ads? You can grab the ad-free pdf pattern an crochet without distractions. Click the link below and be on your way to crocheting something beautiful and cozy for yourself, or a loved one.

DIGITAL DOWNLOAD • NO ADS!
Summer at the Beach Crochet Blanket PDF Pattern
The printable PDF includes the complete pattern in one beautiful, easy-to-follow download.
Special stitches
Stacked Single Crochet- SSC
Work 1 SC into the indicated stitch. Insert your hook into to the vertical bar of the SC just made. YO and pull up a loop. YO and pull through both loops. (The SCC acts as the first DC of the row)
Front Post Double Crochet- FPDC
YO. Insert the hook from the front to back ad then back to front around the post of the indicated st. YO and pull up a loop. YO pull through 2 loops, YO pull through the remaining 2 loops.
Back Post Double Crochet- BPDC
YO. Insert the hook from back to front and then front to back around the post of the indicated st. YO and pull up a loop. YO and pull through 2 loops. YO and pull through the remaining 2 loops.
Cabled Group- CG Font Post for RS/Back Post For WS
The Cable Group is worked over the next 3 sts.
Fpdc around indicated st
Sk the next st
Fpdc around the following st
Go back to the st you skipped and work fpdc around that skipped st.
When the pattern says: *CG over next 3 sts, dc in the next 3 sts.*
You will work: 3-st cable-group, then 1 dc in each of the next 3 sts. The entire repeat uses 6 sts.
Color Pattern
The color pattern listed below is for both the baby and throw size. Feel free to alter the color pattern and colors to your preferred color choices.
COLOR A/MC Buff- 10(12) rows
COLOR B Dust Peach- 22(32) rows
COLOR A Buff- 10(12)rows
COLOR C Nutmeg- 20(28) rows
COLOR A Buff- 10(12) rows
COLOR D Pink- 20(28) rows
COLOR A Buff-10(12) rows
COLOR E Sand- 20(28) rows
COLOR A Buff- 10(12) rows
COLOR F Soft Pink- 20(32) rows
COLOR E Sand- 10(20) rows
Pattern Begins
Foundation
With Color A, ch 125(173).
Row 1- RS Beginning in the 2nd ch from the hook, work 1 sc into the bb of each ch across. 124(172) sts. Turn.
Row 2- WS Work ssc in the first st. Dc in each remaining st across. Turn.
Cable pattern
Row 3- RS Ssc in the first st. Work 1 dc in the next 2 sts. *CG over next 3 sts, dc in next 3 sts* Rep from *o* until 1 st remains. Work 1 dc into the final st. Turn.
Row 4- WS Ssc into the first st. Work 1 dc in the next 2 sts. *Bpdc around each of the next 3 fpdc sts from the previous row dc into the next 3 sts.* Rep from *to* until 1 sts remains. Work 1 dc into the final st. Turn.
Repeat rows 3 and 4 for the remainder of the blanket while following the established color pattern as you work. You should have a total of (Baby- 162)(Throw- 220) rows.
Final Edge Row (Both Sizes)
Do not fasten off after the final WS cable-pattern row. Turn. Ch 1, work 1 sc into each st across. 124(172) sts. Fasten off. Weave in any remaining tails.
Blocking
Soak your blanket in lukewarm water and if desired, add a small amount to gentle wool wash or appropriate fiber wash. Submerge the blanket and allow it to soak for 25-30 min. Carefully lift the blanket from the water. Do not wring the blanket or twist it, doing this could distort your work. Gently press out excess water. Lay the blanket on a clean towel and roll the towel around it to move additional moisture. Lay the blanket flat on your blocking mats and pin to measurements. *See schematic* Use blocking pins if needed. Allow the blanket to fully dry before adding the fringe detailing.
Optional Knotted Fringe
The fringe is added along the top and bottom edges only. Cut strands approximately 14 inches long. Hold 5 strands together and fold them in half. Insert your crochet hook through the first edge stitch. Place the folded center of the strands over the hook and pull the loop through the stitch. Tighten gently. Place one fringe bundle approx. every third stitch across the edge. Repeat along both ends of the blanket.
Knotted Finish
For the decorative knotted finish, divide one fringe bundle into two groups of 5 strands. Combine 5 strands from one bundle with 5 strands from the neighboring bundle and tie them together. Continue across, keeping the knots at the same height. Once finished, straighten the fringe and trim the ends evenly.
Make it your Own!
Although the original blanket uses soft pinks and warm earthy neutrals, you can completely customize the color palette. Try costal blues and cream for a beach inspired version, earthy rust and olive for a deeper boho palette, soft pastels for a nursery blanket, or work the entire design in one color to emphasize the cable texture.
Copyright and Pattern Use
The Summer at the Beach Crochet Blanket pattern is the property of JusBeeCreations Crochet Designs . You may sell finished handmade items created from this pattern. Please credit JusBeeCreations Crochet Designs as the pattern designer when selling or sharing finished projects.
The written pattern and accompanying photographs may not be copied, redistributed, reproduced, or used to sell your own finished items. The original PDF contains the same restrictions while permitting the sale of finished handmade pieces.
Final Thoughts
The Summer at the Beach Crochet Blanket is one of those projects that bring together texture, color and cozy boho-style in such a beautiful way. With its raised cable details, soft color changes, and optional fringe, it’s easy to make this blanket feel completely your own. The pattern includes both Baby and Throw sizes and steps included if you would like to alter the size of the blanket.
I hope you enjoy making your blanket as much as I enjoyed designing it. Have fun choosing your colors, adding your personal touches, and don’t forget to share your finished project with JusBeeCreations Crochet Designs. We’d love to show case your work here on the blog1 Happy Crocheting!
we’ve got a community!
friends! Join our group to post
pictures and ask all your pattern
support questions.


-
Purchasing the pdf pattern is a great resource when working patterns. It also packed with extras like, stitch count tracking, printable tags, customizing tips, and other bonus material not listed on the blog. Our pdf patterns are always loaded with lots of extra content to make it easier for you to complete the pattern.
-
No. The colors listed in the pattern are the colors I choose to match the theme I was going for, for this project. You are more than welcome to use the desired colors of your choosing to match with your home décor or what ever look you are going for.
-
No, you do not have to knot the fringe. You can keep the fringe straight and not knot them or you can do as stated in the pattern. You could even leave the fringe off all together. Get creative and have fun choosing your own colors.

Hi, I'm Brittany!
Designer behind
JusBeeCreations Crochet Designs
Welcome to JusBeeCreations Crochet Designs, where modern crochet, creativity, and handmade style come together.
I create crochet patterns designed to be beautiful, practical, and enjoyable to make — with clear instructions to help crocheters feel confident from the first stitch to the last.