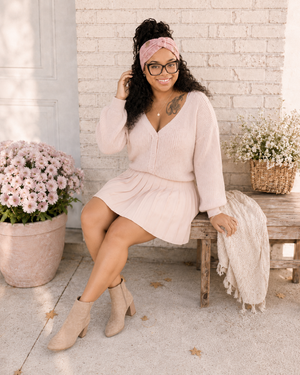
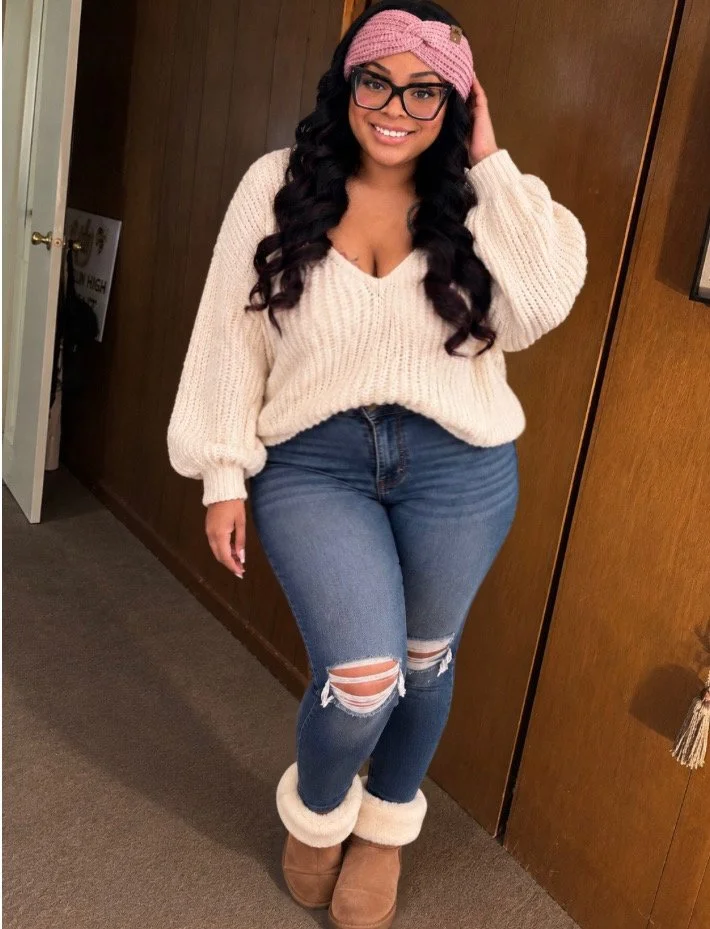
There is something so special about a handmade accessory that combines warmth, comfort, and style, especially during those chilly fall and winter months!
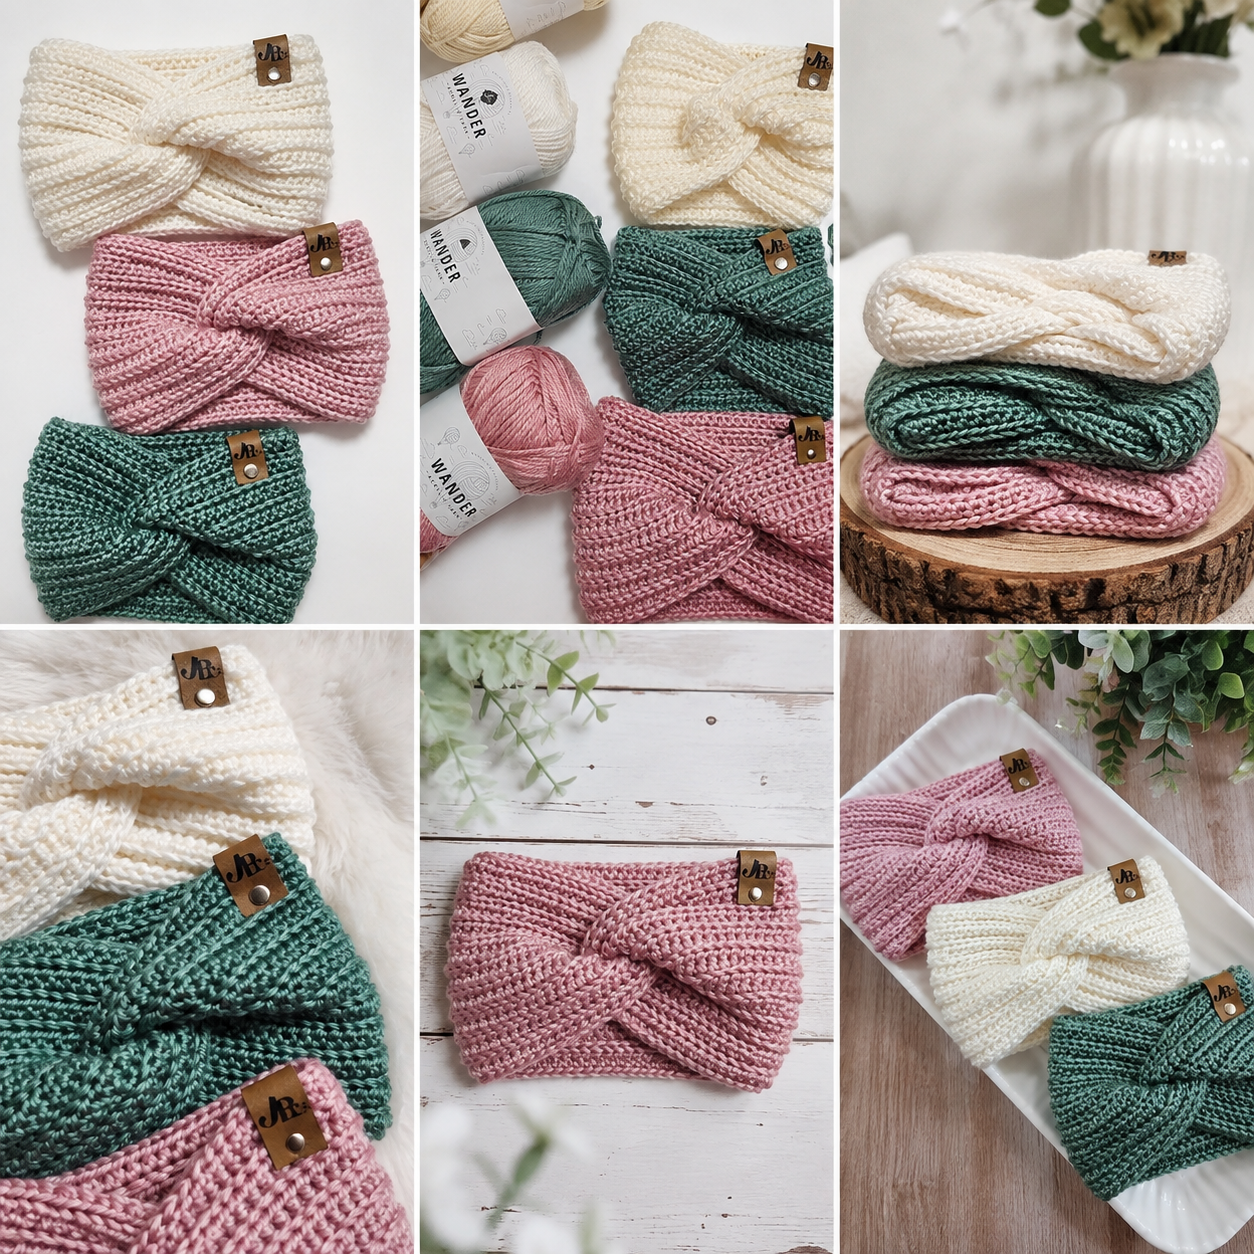
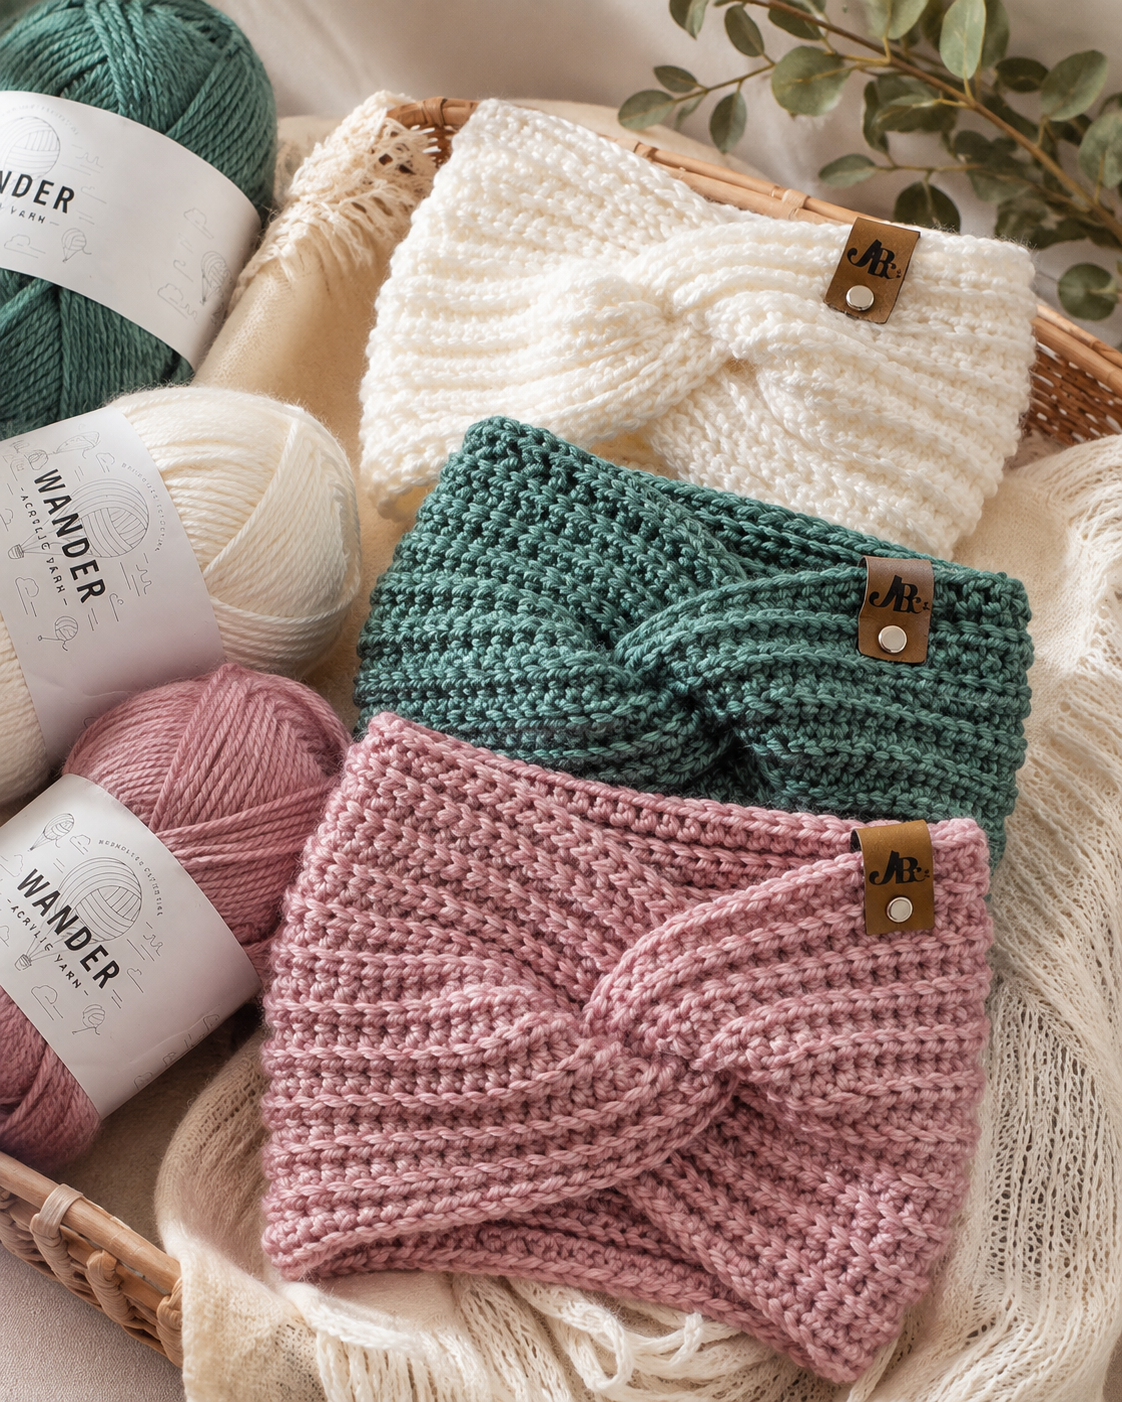
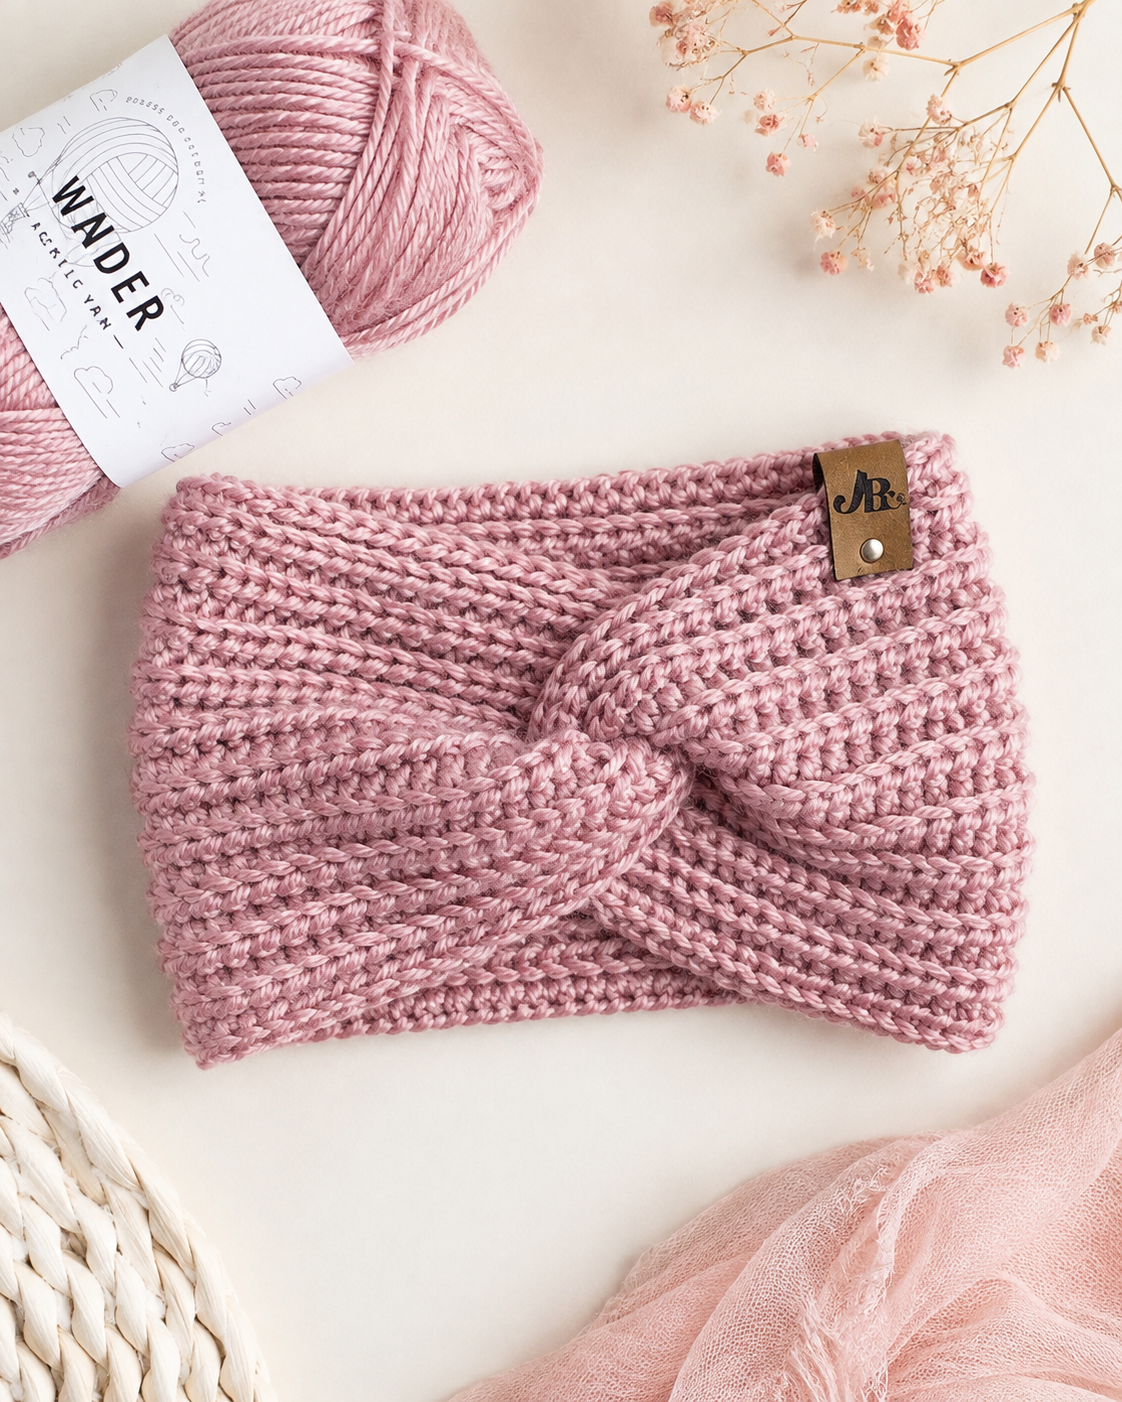
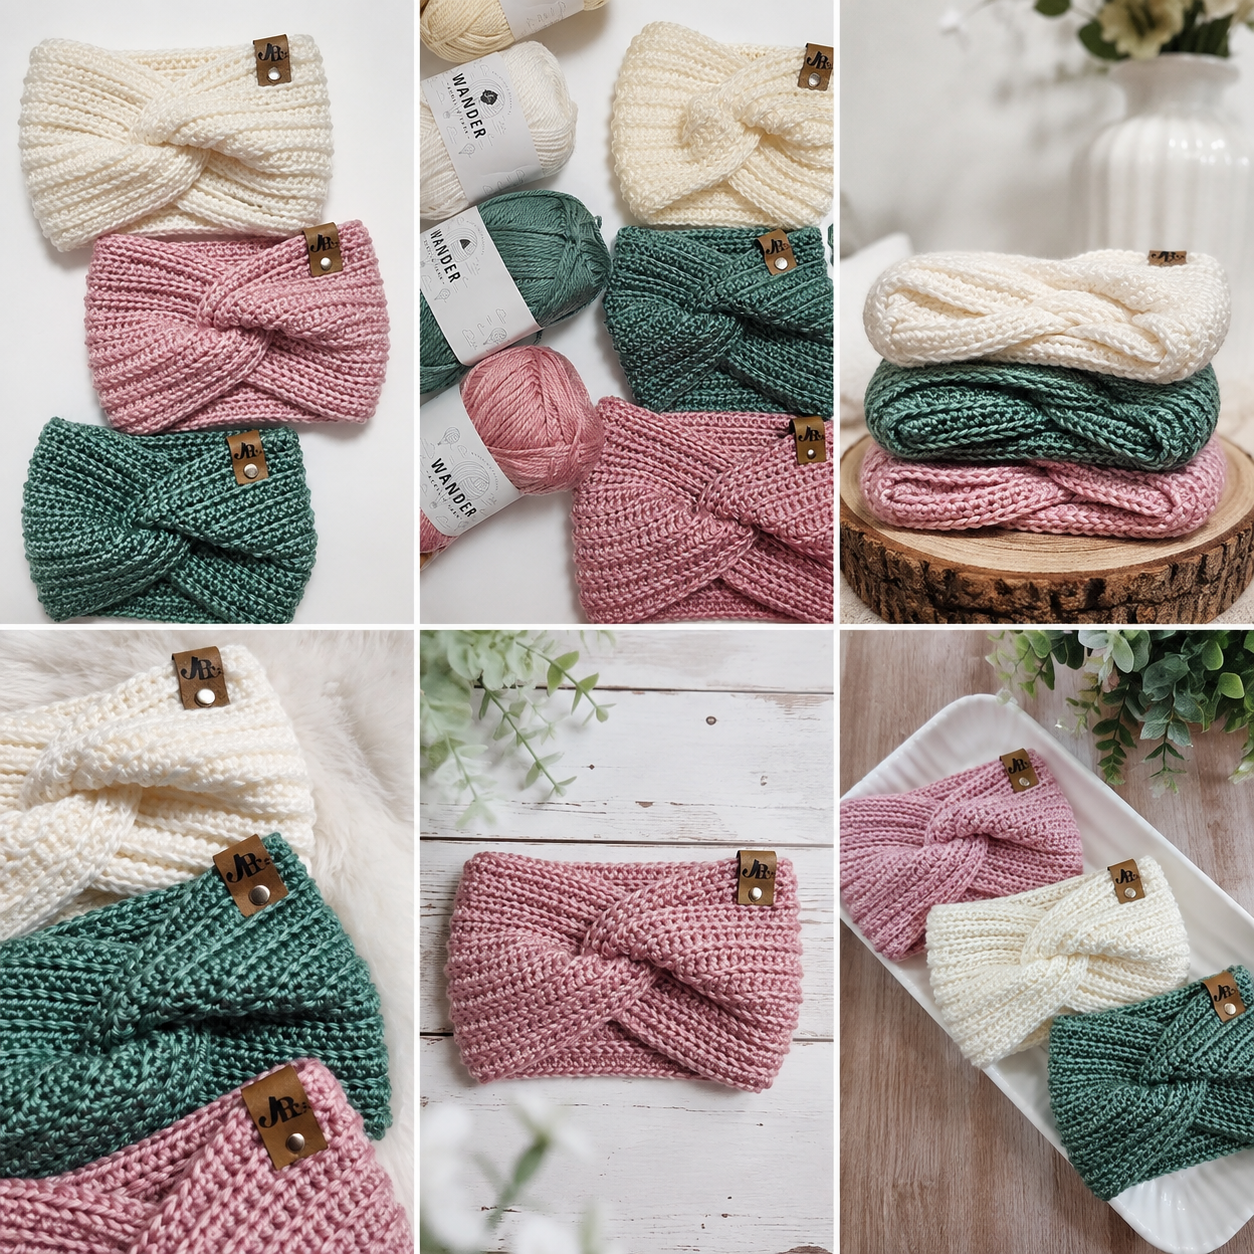
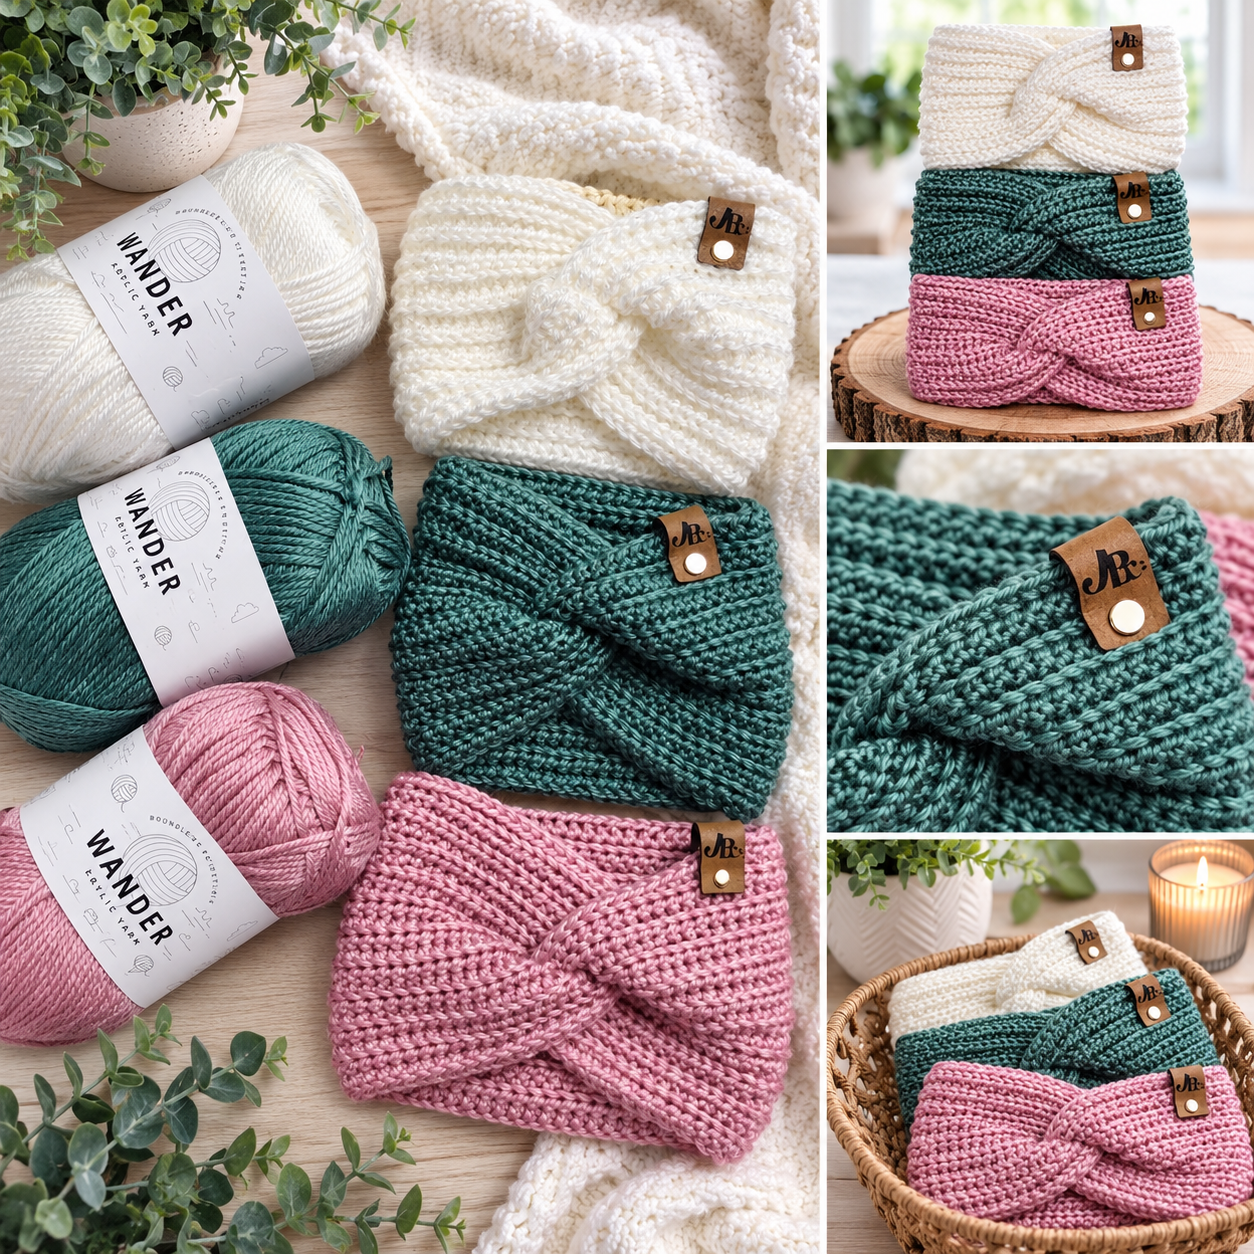
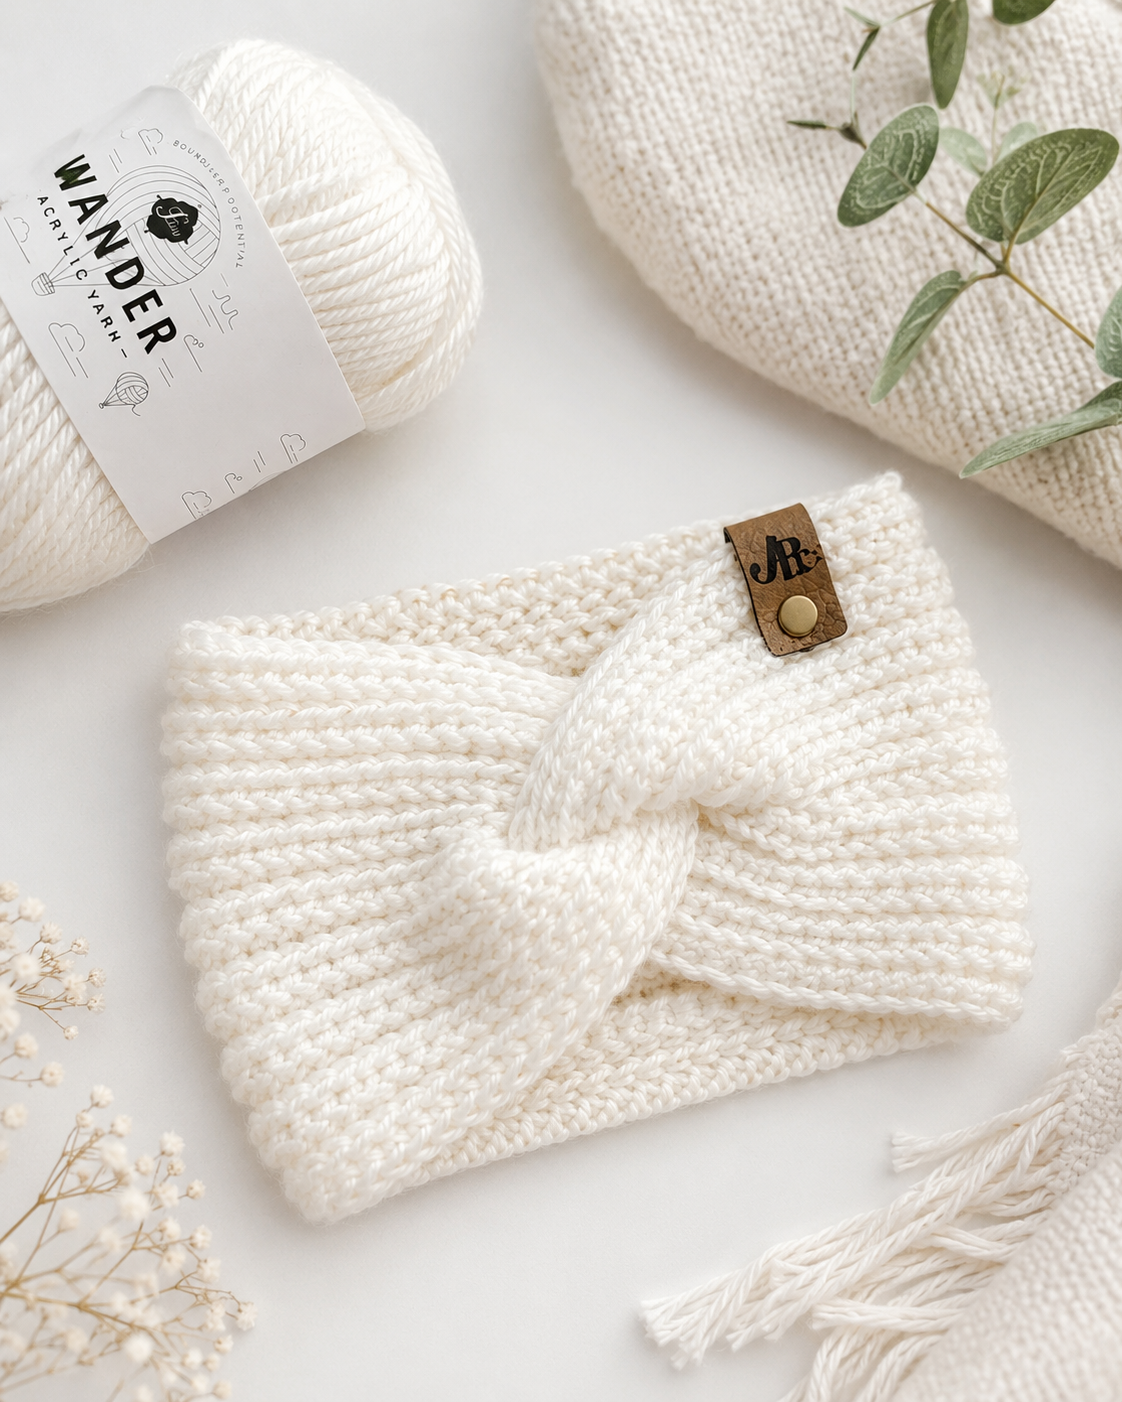
My Winter with a Twist Crochet Ear Warmer has always been one of my favorite designs. I wanted to create something that was simple enough for newer crocheters to enjoy, but still featured a beautiful texture that would make the finished piece look elegant and unique. Using a combination of half double crochet stitches and half double crochet slip stitches, this design creates a gorgeous raised ribbed texture that gives the ear warmer its cozy appearance.
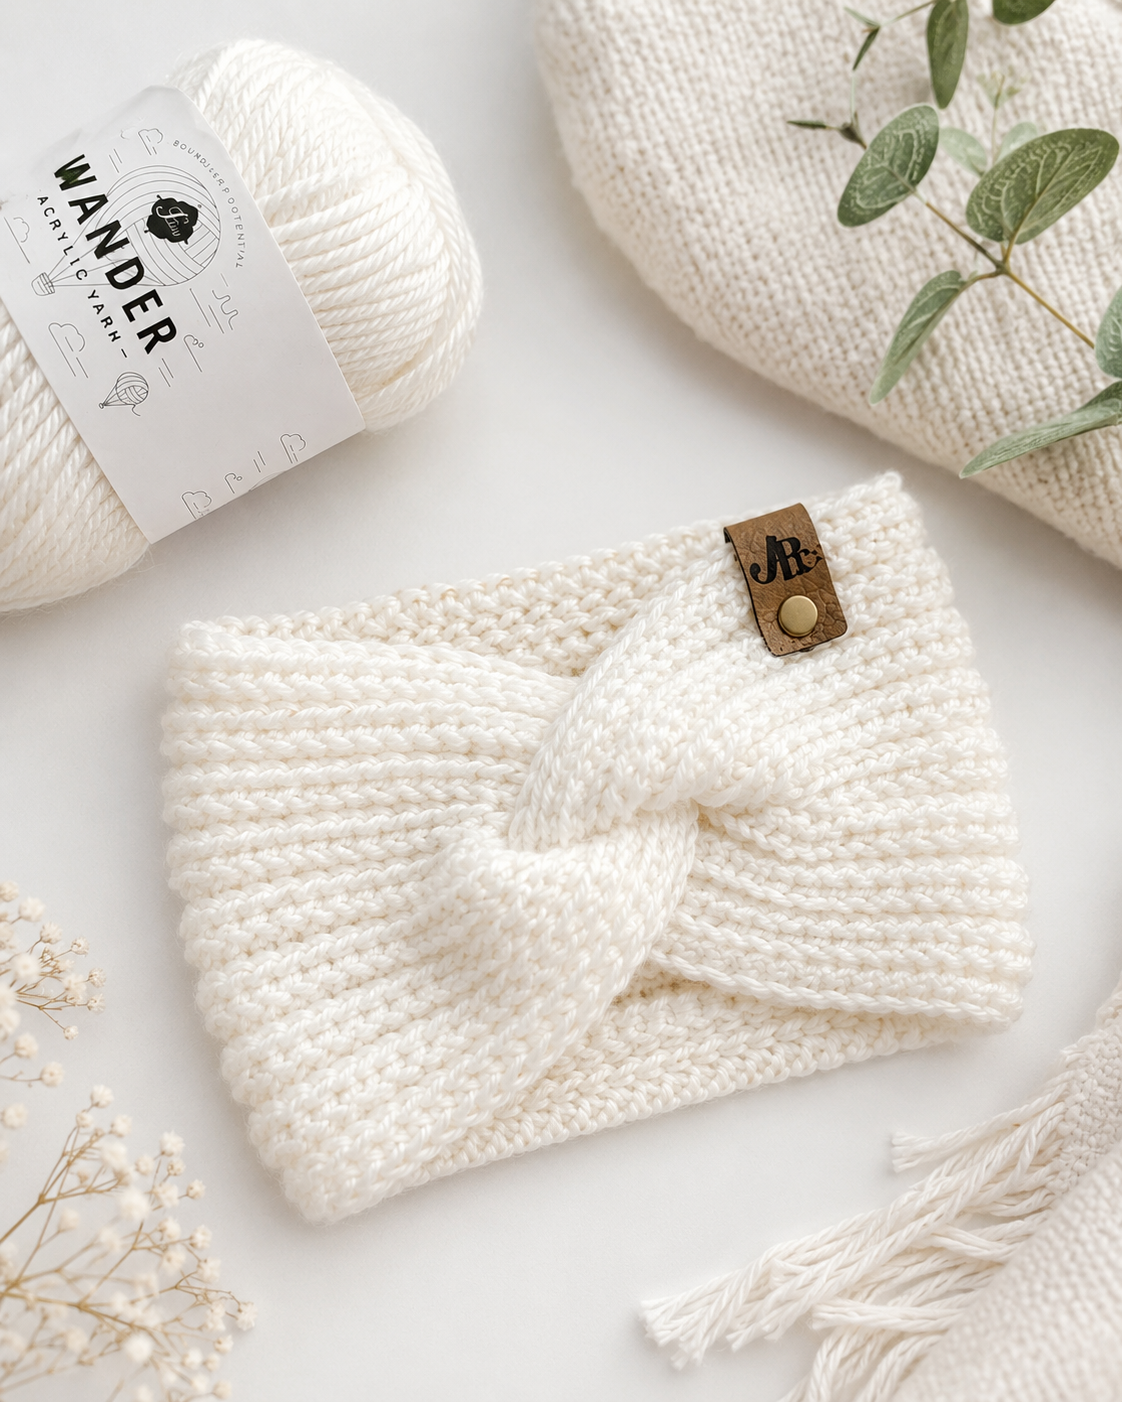
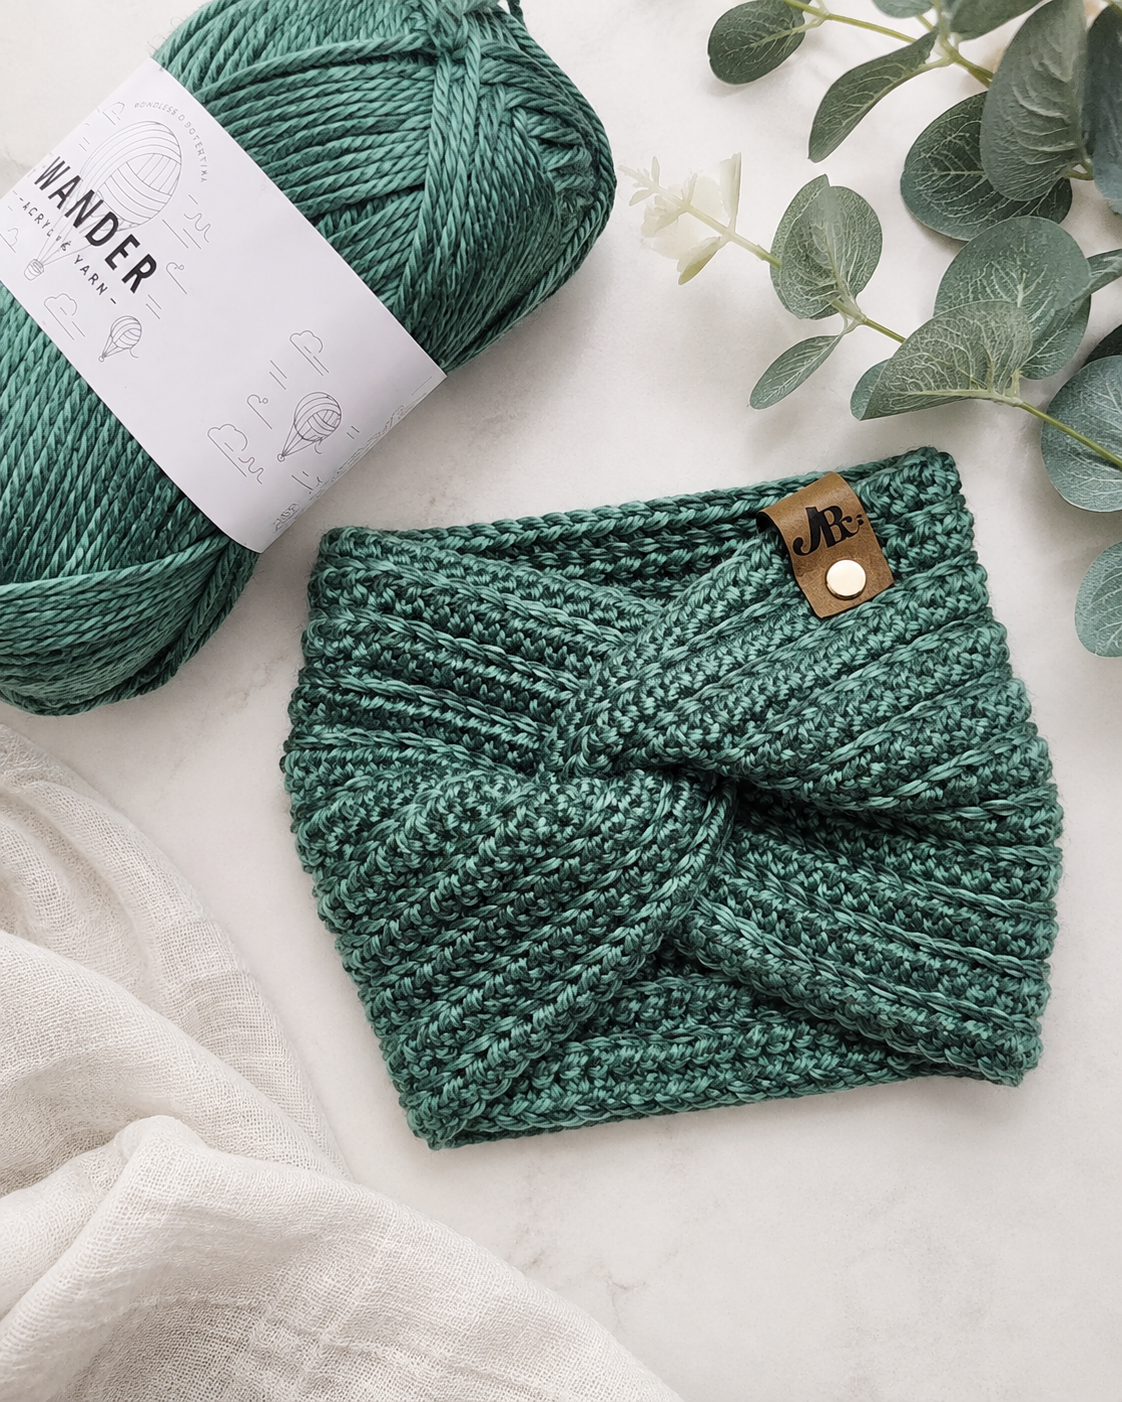
And, of course, we can’t forget my favorite part — the twist! The beautiful twisted front adds an extra touch of style without requiring any complicated increases, decreases, or shaping. The secret is all in the way the ends are folded and sewn together.
Whether you’re making one for yourself, gifting one to someone special, or crocheting matching ear warmers for the family, this pattern is a wonderful addition to your handmade winter accessory collection.
Available in four sizes from Baby to Adult, this pattern is also a great way to practice working textured crochet stitches while creating something beautiful and practical. So grab your favorite yarn, your crochet hook, and let’s get started!
Happy crocheting!
Disclaimer
This pattern is for professional use only. No part of this pattern maybe copied, reproduced, translated, distributed, sold, or shared in any form without written permission from JusBeeCreations Crochet Designs. You are welcome to sell finished handmade items created from this pattern in small quantities. Please credit JusBeeCreations Crochet Designs as the pattern designer.
Affiliate Disclaimer
This post may contain affiliate links. If you make a purchase through one of my affiliate links, I may receive a small compensation at no additional cost to you. Thank you for supporting JusBeeCreations Crochet Designs and allowing me to continue sharing crochet patterns and tutorials.
Behind the Design
Sometimes, the simplest crochet stitches can create the most beautiful designs, and that’s exactly what inspired my Winter with a Twist Crochet Ear Warmer!
When creating this pattern, I wanted something that combined cozy winter comfort with a little touch of elegance. I love accessories that are practical enough for everyday wear but still have that special handmade detail that makes them stand out.
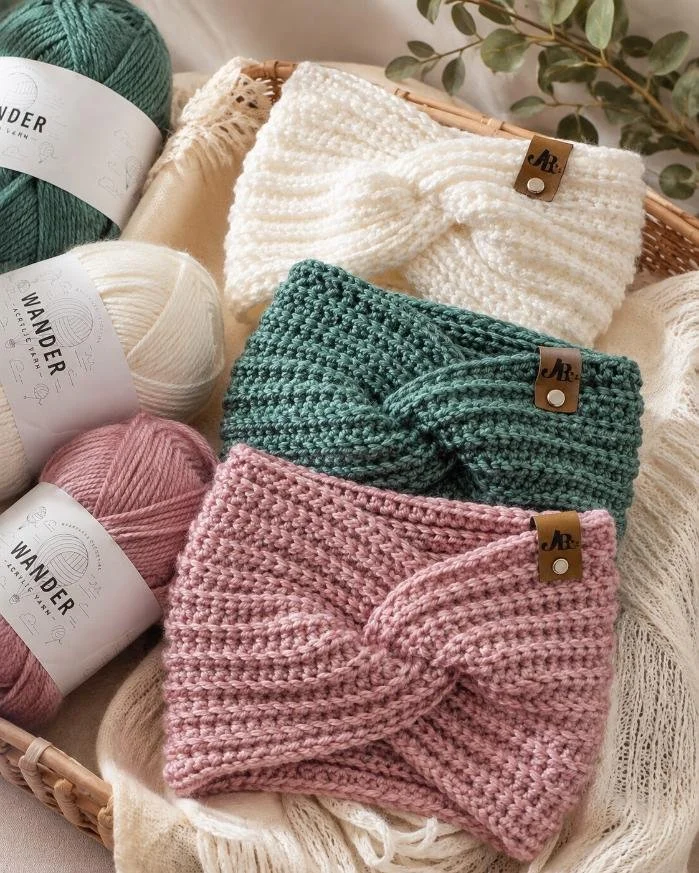
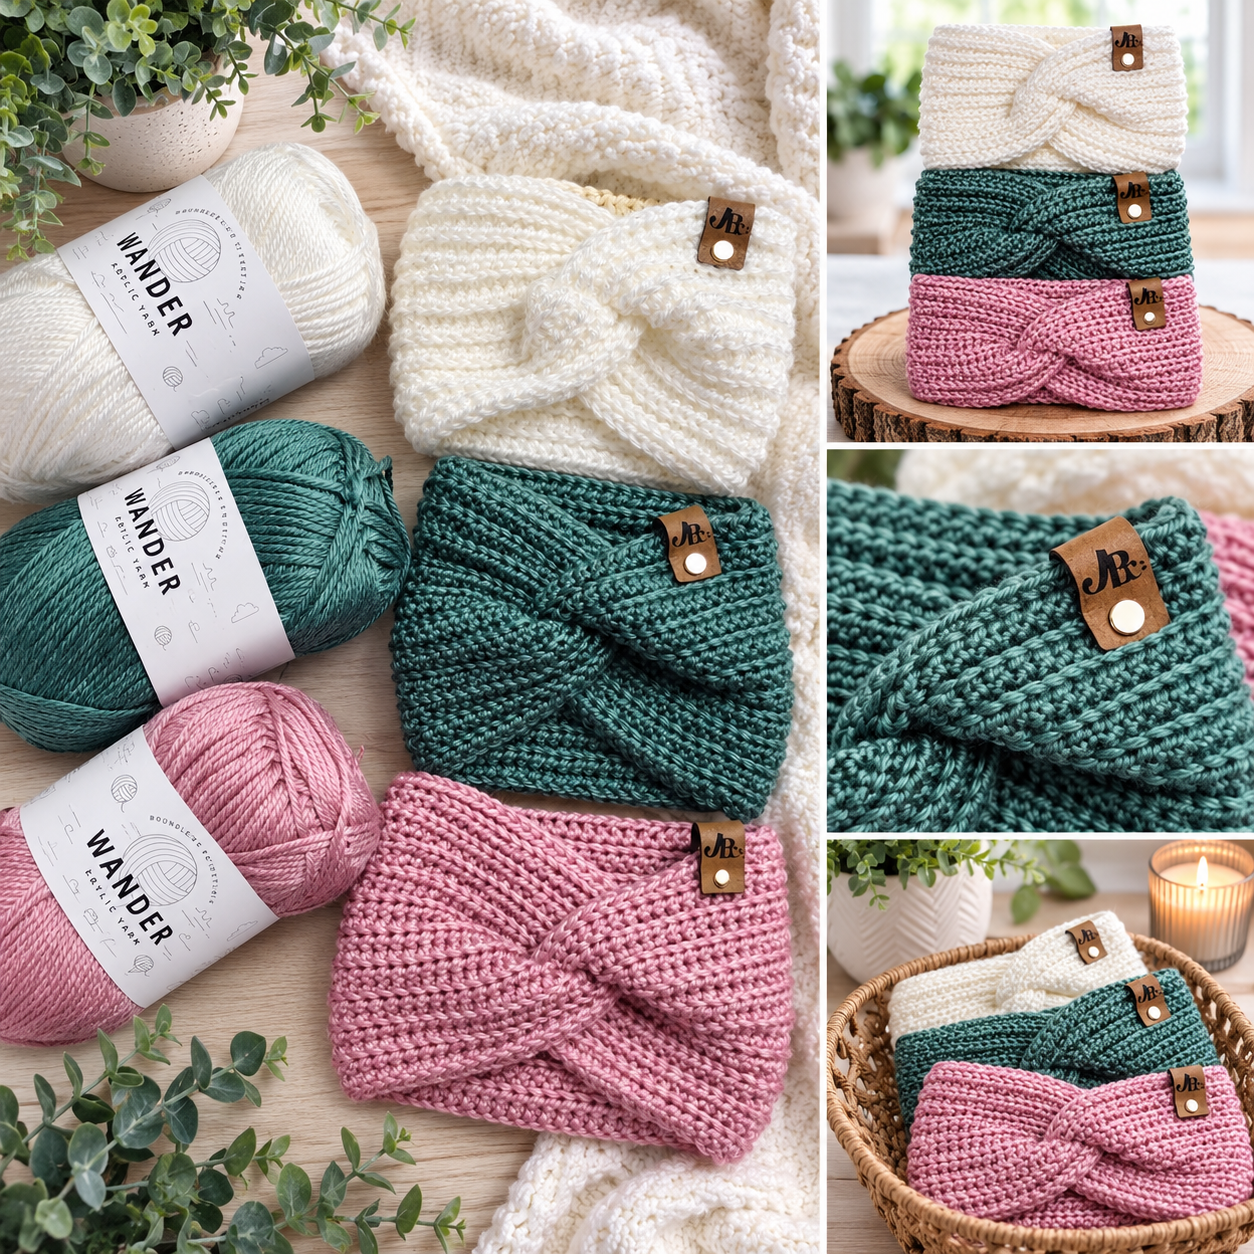
One of my favorite parts of designing this ear warmer was experimenting with texture. By alternating half double crochet stitches with half double crochet slip stitches, and working into the back loops, I was able to create a beautiful raised ribbed texture without using complicated stitch combinations. The softness and subtle sheen of Furls Crochet Wander yarn made the finished design even more beautiful.
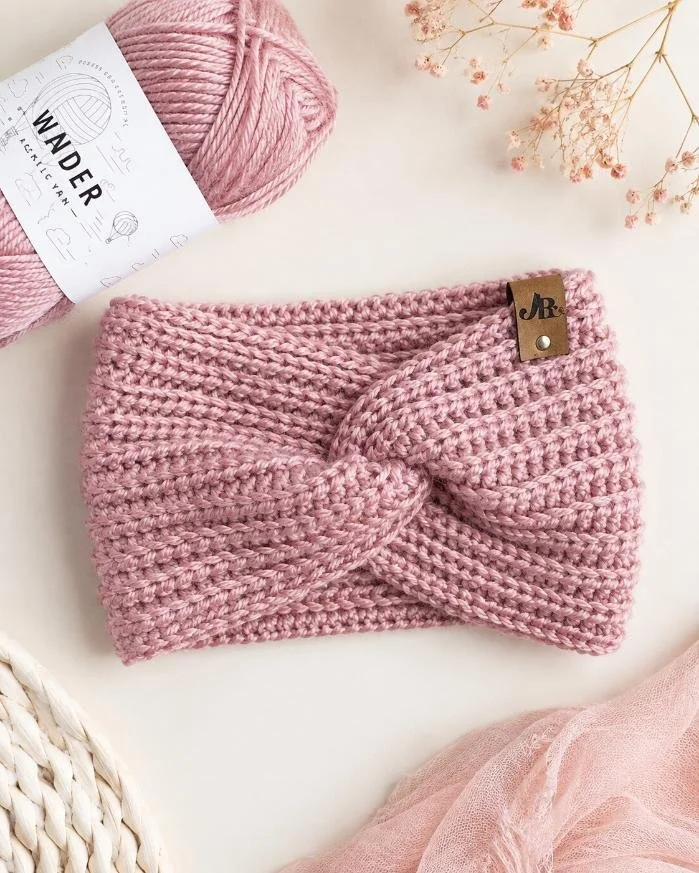
But what really brings this design together is the signature twisted front. I love how such a simple folding and seaming technique can completely transform an ordinary crochet rectangle into a stylish winter accessory.
I also wanted this pattern to be something the whole family could enjoy, which is why I designed it in four sizes, from Baby to Adult. Whether you’re making matching ear warmers, creating thoughtful handmade gifts, or simply treating yourself to something cozy, there’s a size for everyone.
The Winter with a Twist Ear Warmer is a reminder of one of the things I love most about crochet: you don’t need complicated stitches to create something beautiful. Sometimes, all it takes is a little texture, a little creativity, and, of course, a twist!
I hope you enjoy bringing this design to life as much as I enjoyed creating it.
Happy Crocheting!
Pattern at a Glance
Throughout this pattern, you’ll practice: Creating a foundation chain. Working half double crochet stitches. Making half double crochet slip stitches. Crocheting into the back loops only. Maintaining consistent stitch counts. Creating textured crochet fabric. Measuring and adjusting the length of your project. Folding and sewing a twisted crochet seam. Finishing your project neatly. If you’ve been wanting to explore textured crochet without tackling a complicated stitch pattern, this is a great place to start!
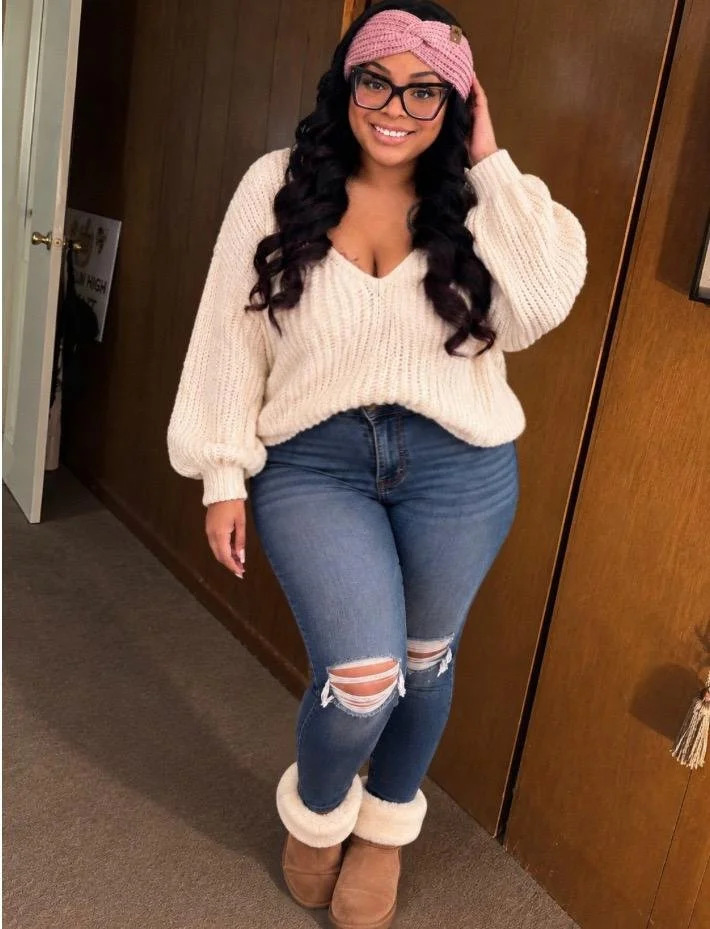
Why You’ll Love this Pattern
There are so many reasons to fall in love with the Winter with a Twist Ear Warmer!
Beginner-Friendly Design: Uses simple crochet stitches to create a beautiful textured finish.
Four Sizes Included: Make matching ear warmers for babies, toddlers, children, and adults.
Beautiful Twisted Front: A simple sewing technique creates an elegant twist.
Quick Crochet Project: Perfect for last-minute handmade gifts or craft market preparations.
Cozy and Comfortable: The textured fabric provides warmth without being overly bulky.
Easy to Customize: Adjust the width, length, and yarn colors to create your own unique style.
Great for Gift Giving: Perfect for birthdays, holidays, and thoughtful handmade presents.
This pattern is especially lovely when crocheted in soft, solid-colored yarns that allow the stitch texture to stand out.
About the Yarn
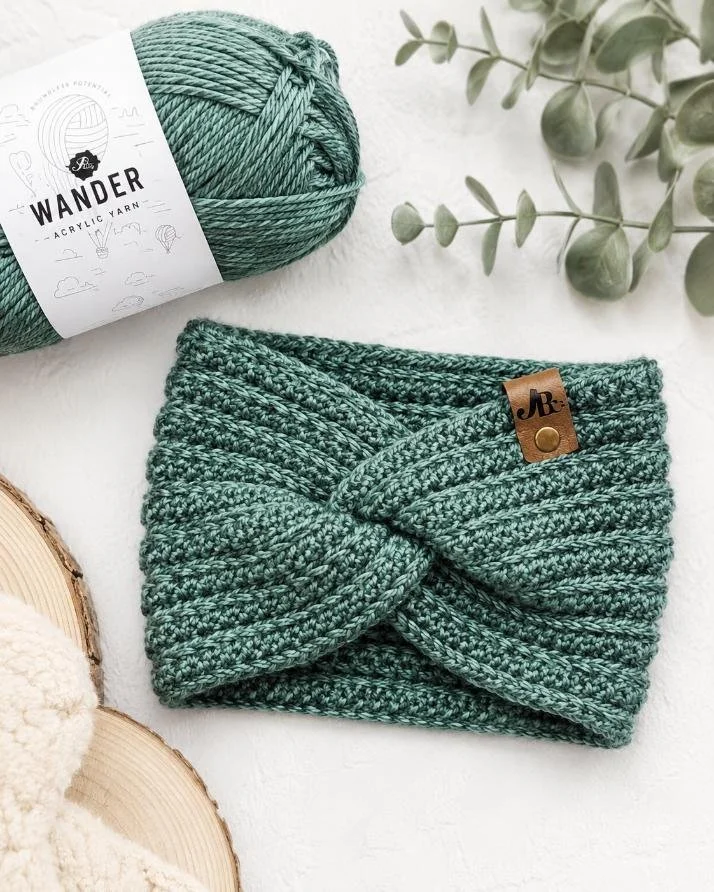
For my Winter with a Twist Crochet Ear Warmer, I chose Wander Yarn by Furls Crochet, a beautiful worsted-weight yarn that adds the perfect combination of softness, warmth, and elegance to this cozy winter accessory.
One of the things I love most about Wander yarn is its gorgeous, subtle sheen. It gives the finished ear warmer a polished appearance while allowing the textured stitches to really stand out. The combination of half double crochet and half double crochet slip stitches creates beautiful raised ridges, and this yarn complements that texture perfectly.
Made from 100% premium acrylic, Wander yarn is a wonderful option for creating comfortable, everyday accessories. I especially love how the yarn works up into a soft, cozy fabric that’s perfect for keeping your ears warm during chilly fall and winter days.
Yarn Details
Brand: Furls Crochet
Yarn: Wander
Weight: Medium #4 Worsted
Fiber Content: 100% Premium Acrylic
Skein Weight: 100 g
Yardage: 120 yards per skein
Colors Used: Snow, Aurora, Surf, and Alabaster
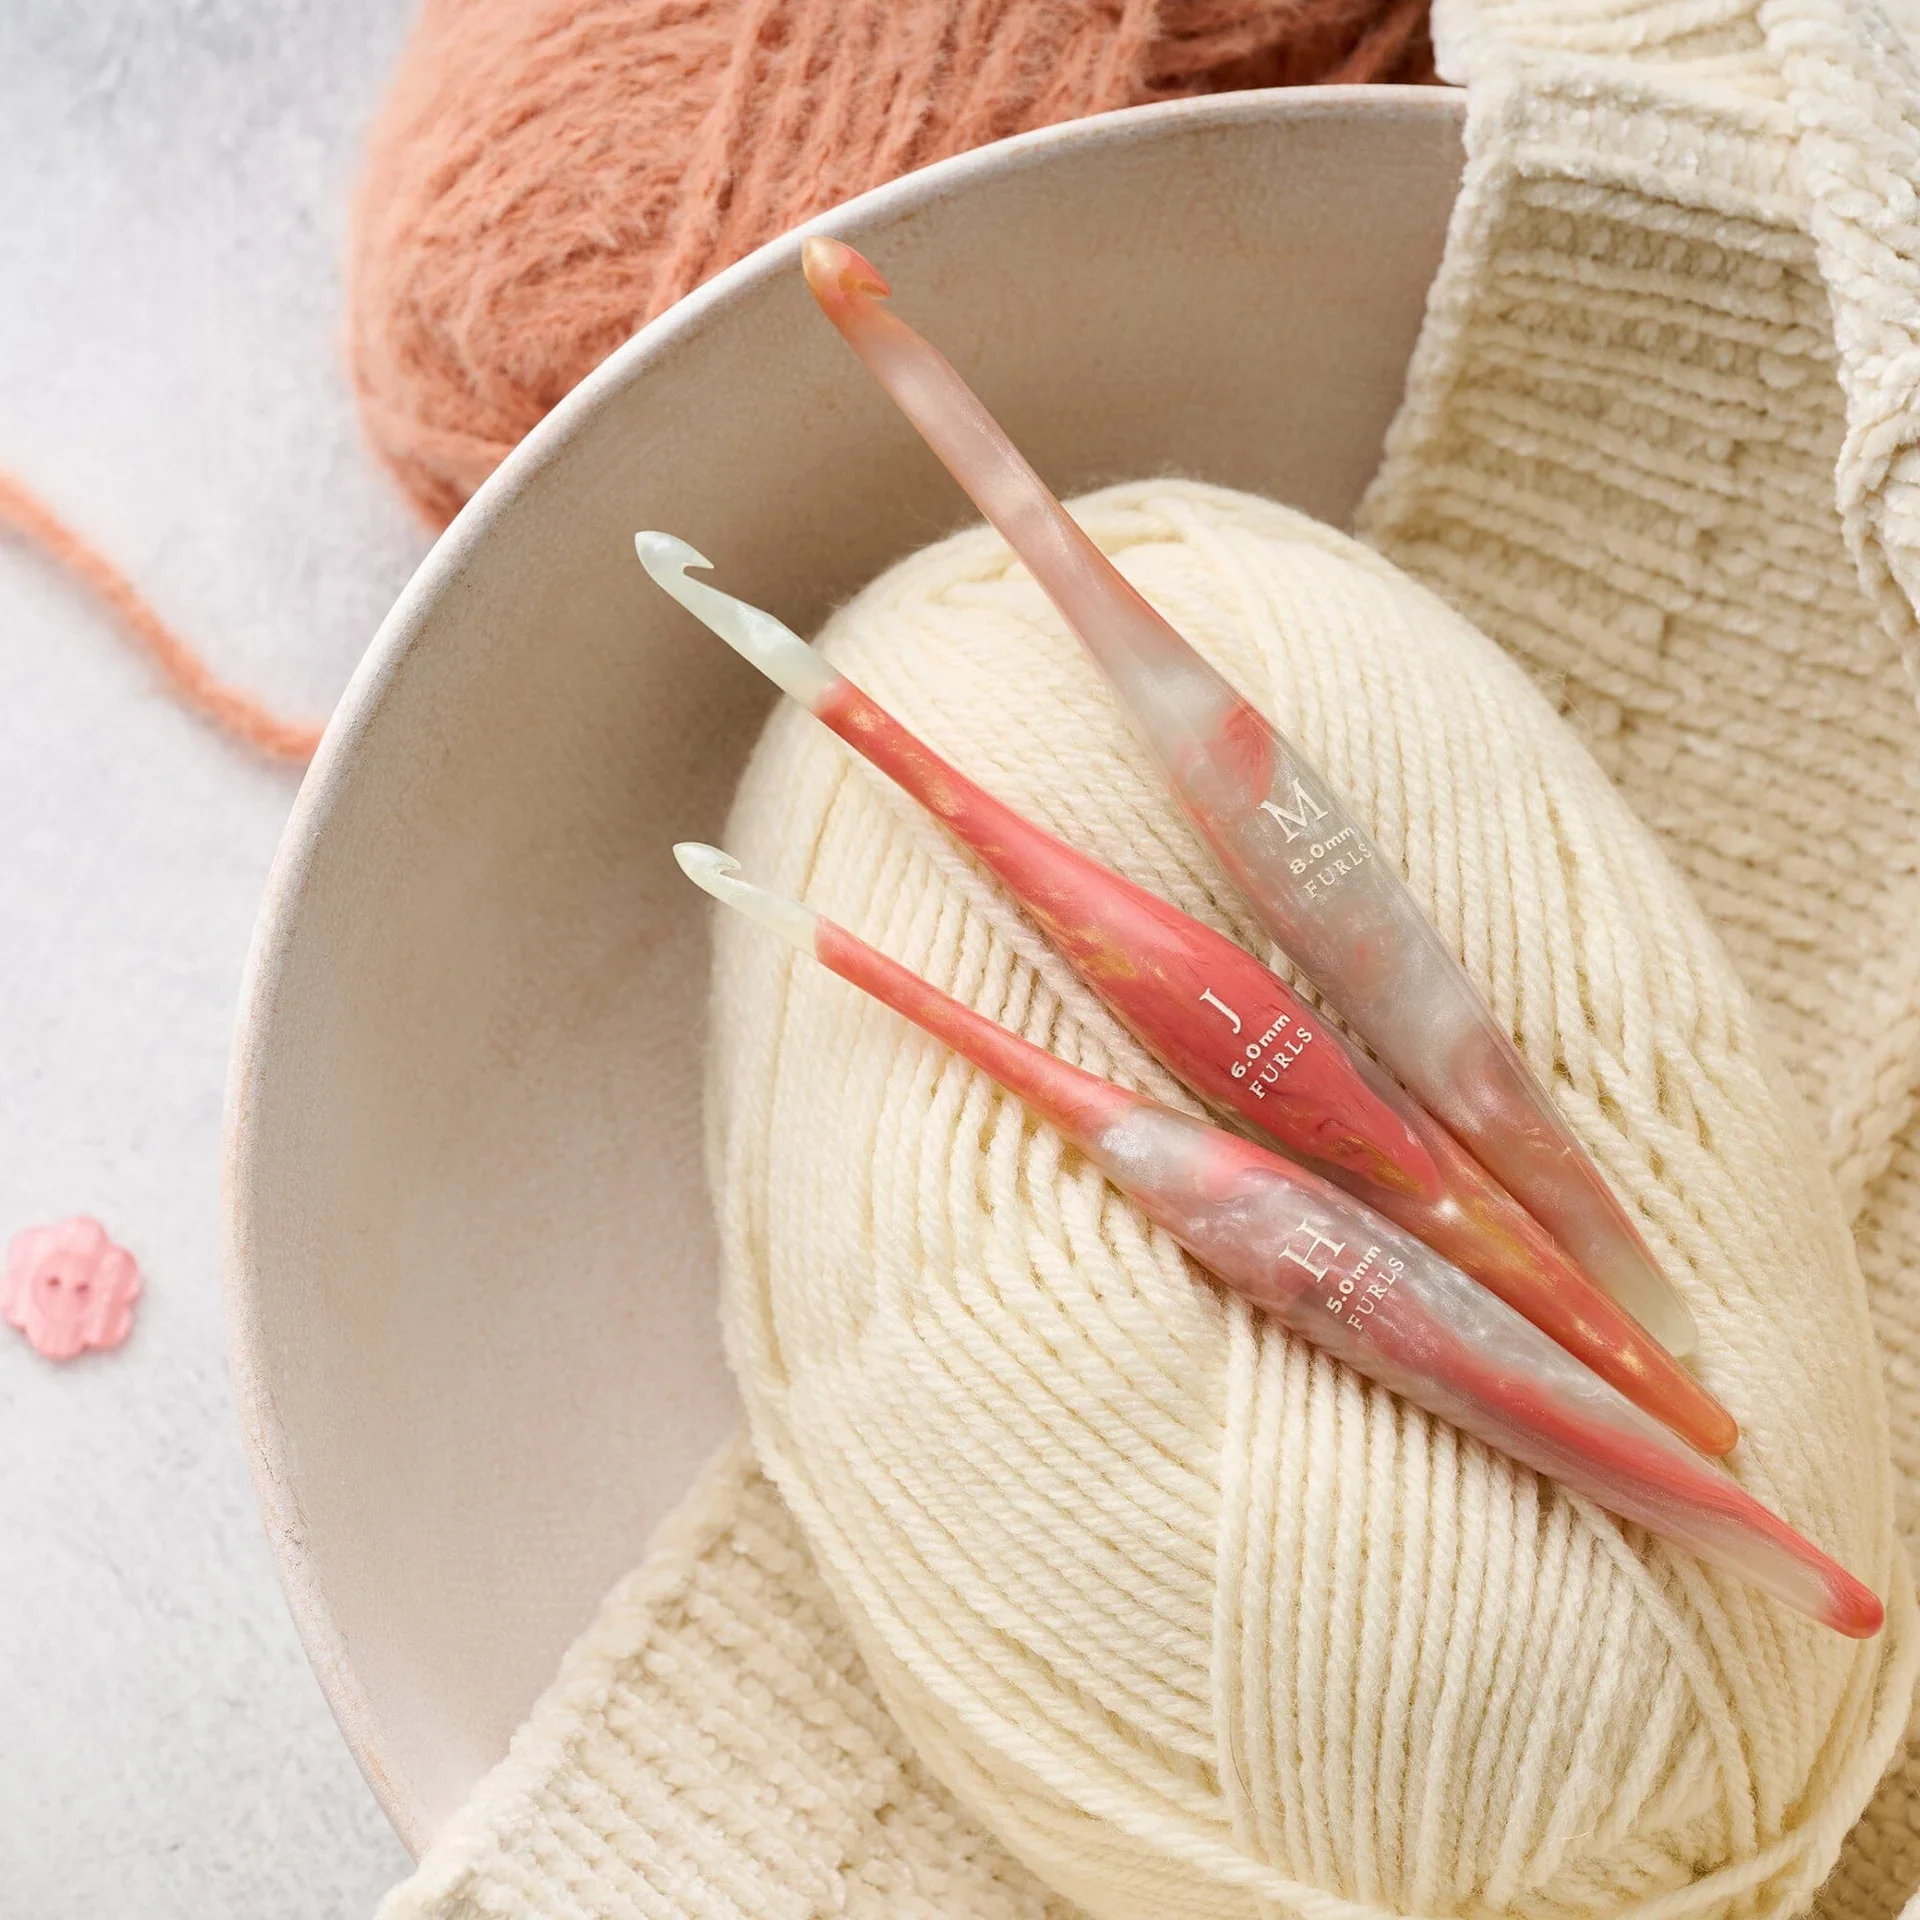
Crochet Hook: 5.5 mm (US I/9)
Yarn Amounts
This yarn also creates excellent stitch definition, allowing the textured ribbing to really stand out.
Yarn Quantity: The pattern specifies one skein per ear warmer. However I suggest purchasing an extra skein . It’s always better to have more than not enough.
Baby: 45-65 yards, 1 skein
Toddler: 60-80 yards, 1 skein
Child: 80-105 yards, 1 skein
Adult: 100-120 yards, 1 skein, with one extra depending on your tension and yarn being used.

MORE CROCHET • MORE INSPIRATION
Join the JBC Crochet Circle
Become part of the JBC Crochet Circle and enjoy a cozy space created for crocheters who love patterns, helpful resources, creative inspiration, and a few special extras along the way.
Already a member? Sign in to visit your Crochet Circle member area.
JOIN THE JBC CROCHET CIRCLEYarn Substitutions
For the best results, choose a #4 Worsted Weight yarn with a similar thickness, texture, and fiber content to Furls Crochet Wander Yarn. Always make a gauge swatch before beginning, as differences in yarn thickness and fiber can affect the finished size, stretch, and textured appearance of your Winter with a Twist Crochet Ear Warmer.
My #1 Choice
Premier Anti-Pilling Everyday Worsted
Weight:
#4 Worsted
Fiber:
100% Anti-Pilling Acrylic
Yardage:
Approx. 180 yds / 100 g
My first choice for an acrylic alternative to the original yarn. Premier Anti-Pilling Everyday Worsted offers a combination of softness, durability, and beautiful stitch definition. Its anti-pilling fibers make it a lovely option for frequently worn crochet accessories, while its smooth texture helps the ear warmer's raised ribbing stand out.
Premium Option
Malabrigo Rios
Weight:
Worsted
Fiber:
100% Superwash Merino Wool
Yardage:
Approx. 210 yds / 100 g
A beautiful choice if you prefer a softer, luxurious wool. Malabrigo Rios offers wonderful warmth, softness, and rich hand-dyed colorways. The smooth finish creates lovely stitch definition, helping the ear warmer's textured ribbing stand out while maintaining a cozy and elegant appearance.
Soft Sheen Alternative
Lion Brand Heartland
Weight:
#4 Worsted
Fiber:
100% Acrylic (Solid Colors)
Yardage:
Approx. 251 yds / 142 g
A wonderful option for crocheters who enjoy working with soft acrylic yarns. Lion Brand Heartland offers beautiful heathered colors and a subtle sheen, giving the finished ear warmer a polished look. Its soft texture complements the raised crochet stitches while creating a comfortable accessory for chilly days.
Hook Requirements
Materials
Yarn Needle
Scissors
Measuring Tape
Stitch Markers
Garment tags (Optional)
Gauge
13 stitches and 14 rows = 4 inches (10 cm)
Using:
5.5 mm crochet hook
Medium #4 worsted-weight yarn
Alternating HDC BLO and HDC SL ST BLO stitch pattern
How to Check Your Gauge
Before beginning your ear warmer, I recommend working a small gauge swatch.
Make a foundation chain long enough to create a swatch larger than 4 inches.
Work your first row in half double crochet.
Work the next row using half double crochet slip stitches in the back loops only.
Continue alternating these two rows.
Once the swatch is large enough, lay it flat without stretching.
Measure a 4-inch section in the center.
Your target gauge is 13 stitches and 14 rows per 4 inches.
Why Gauge Matters
Gauge is especially important when crocheting wearable accessories.
If your stitches are too tight, the finished ear warmer may not stretch enough to fit comfortably.
If your stitches are too loose, the ear warmer may become oversized and slide down during wear.
You may need to adjust your crochet hook size to match the recommended gauge.
Ear Warmer Schematics
The Winter with a Twist Crochet Ear Warmer is worked flat in rows to create one textured rectangle. The foundation chain determines the length around the head, while the number of rows determines the width. Once the rectangle is complete, the short ends are folded and interlocked to create the signature twisted front.
Flat Ear Warmer Construction
WIDTH
ROWS
RECTANGLE
Diagram represents the ear warmer before the twisted seam is completed. Not drawn to scale.
Sizing Notes:
The foundation chain determines the length around the head.
The number of rows determines the width of the ear warmer.
The twisted seam may slightly reduce the finished circumference.
The fabric should stretch gently around the head without feeling uncomfortably tight.
Measure your completed strip before seaming.
These are recalculated, untested measurements. Check the final fit and dimensions on crocheted samples before using the chart as verified sizing.
For baby sizes, use only during awake, directly supervised wear and remove before sleep.
Construction
The Winter with a Twist Crochet Ear Warmer is worked flat in rows, creating one rectangular piece. The foundation chain runs along the length of the ear warmer, while the rows gradually build its width. The stitch pattern alternates between:
Row A: Half Double Crochet Slip Stitch in the Back Loop Only.
Row B: Half Double Crochet in the Back Loop Only.
This combination creates the soft textured fabric featured throughout the design. Once the desired number of rows is completed, a final slip-stitch row finishes the edge. The short ends of the rectangle are then folded, intertwined, and sewn together to create the decorative front twist. There are no increases or decreases required.
Abbreviations
This pattern is written using standard US crochet terminology.
Note: Any special stitches used in the pattern are explained separately in the Special Stitches section.

DIGITAL DOWNLOAD • NO ADS!
Upgrade to the Printable PDF Pattern
The printable PDF includes the complete pattern in one beautiful, easy-to-follow download.
Special Stitches
Before beginning the pattern, let’s take a closer look at the two stitches that create the beautiful texture.
Half Double Crochet (HDC)- Yarn over. Insert your crochet hook into the indicated stitch. Yarn over and pull up a loop.
You should now have three loops on your hook. Yarn over and pull through all three loops. You have completed one half double crochet stitch.
Half Double Crochet Slip Stitch (HDC SL ST)
This stitch is also commonly referred to as a yarn-over slip stitch. It creates a beautiful raised texture that pairs perfectly with traditional half double crochet.
Instructions:
Yarn over. Insert your hook into the indicated stitch. Yarn over and pull up a loop. You should now have three loops on your hook.
Using the loop you just pulled up, carefully pull it through the remaining two loops on your hook. You should now have one loop remaining.
Back Loop Only (BLO)
When looking at the top of a crochet stitch, you’ll notice two loops forming a small V. The loop closest to you is called the front loop. The loop farther away from you is called the back loop. For this pattern, you’ll insert your hook into the back loop only when instructed. Working into the BLO creates the raised ridges that give the ear warmer its signature texture.
Patten Begins
Baby Size
Row 1 (RS): CH 47. Working into the second CH from your hook, make 1 HDC. Continue working 1 HDC into each remaining CH across. CH 1 and turn. Stitch Count: 46 HDC
Row 2 (WS): Working into the BLO of the first ST, make 1 HDC SL ST. Continue working 1 HDC SL ST into the BLO of each remaining ST across. CH 1 and turn. Stitch Count: 46 HDC SL ST
Row 3 (RS): Working into the BLO of the first ST, make 1 HDC. Continue working 1 HDC into the BLO of each remaining ST across.
CH 1 and turn. Stitch Count: 46 HDC
Rows 4–12: Continue alternating Rows 2 and 3.
Stitch Count: 46 STS per row
Row 13 – Finishing Row:
Work 1 SL ST loosely into the BLO of each ST across.
Stitch Count: 46 SL ST
Fasten off, leaving a long tail approximately 18–24 inches for seaming.
Continue to the Twisted Seam Instructions.
Toddler Size
Row 1 (RS): CH 53. Working into the second CH from your hook, make 1 HDC. Work 1 HDC in each remaining CH across. CH 1 and turn. Stitch Count: 52 HDC
Row 2 (WS): Work 1 HDC SL ST into the BLO of the first ST. Continue working 1 HDC SL ST into the BLO of each remaining ST across. CH 1 and turn.
Stitch Count: 52 HDC SL ST
Row 3 (RS): Work 1 HDC into the BLO of the first ST. Continue working 1 HDC into the BLO of each remaining ST across. CH 1 and turn.
Stitch Count: 52 HDC
Rows 4–14: Continue alternating Rows 2 and 3.
Stitch Count: 52 STS per row
Row 15 – Finishing Row:
Work 1 SL ST loosely into the BLO of each ST across.
Stitch Count: 52 SL ST
Fasten off, leaving approximately 18–24 inches of yarn for seaming.
Child Size
Row 1 (RS): CH 60. Working into the second CH from your hook, make 1 HDC. Continue working 1 HDC in each remaining CH across.
CH 1 and turn. Stitch Count: 59 HDC
Row 2 (WS): Work 1 HDC SL ST into the BLO of the first ST. Continue working 1 HDC SL ST into the BLO of each remaining ST across. CH 1 and turn.
Stitch Count: 59 HDC SL ST
Row 3 (RS): Work 1 HDC into the BLO of the first ST. Continue working 1 HDC into the BLO of each remaining ST across. CH 1 and turn.
Stitch Count: 59 HDC
Rows 4–16:
Continue alternating Rows 2 and 3.
Stitch Count: 59 STS per row
Row 17 – Finishing Row:
Work 1 SL ST loosely into the BLO of each ST across.
Stitch Count: 59 SL ST
Fasten off, leaving approximately 18–24 inches of yarn for seaming.
Adult
Row 1 (RS): CH 69. Working into the second CH from your hook, make 1 HDC. Continue working 1 HDC in each remaining CH across.
CH 1 and turn. Stitch Count: 68 HDC
Row 2 (WS): Work 1 HDC SL ST into the BLO of the first ST. Continue working 1 HDC SL ST into the BLO of each remaining ST across.
CH 1 and turn. Stitch Count: 68 HDC SL ST
Row 3 (RS): Work 1 HDC into the BLO of the first ST. Continue working 1 HDC into the BLO of each remaining ST across.
CH 1 and turn. Stitch Count: 68 HDC
Rows 4–18: Continue alternating Rows 2 and 3.
Stitch Count: 68 STS per row
Row 19 – Finishing Row:
Work 1 SL ST loosely into the BLO of each ST across.
Stitch Count: 68 SL ST
Fasten off, leaving approximately 18–24 inches of yarn for sewing.
How to Create the Signature Twist
Now that you’ve completed your ear warmer, it’s time for my favorite part of this design — creating the beautiful twisted front!
This finishing technique may look a little tricky at first, but once you understand how the ends are folded together, it becomes surprisingly simple.
Step 1: Lay Your Ear Warmer Flat
Place your completed crochet rectangle on a flat surface with the right side facing upward. The foundation and finishing edges should run along the length of the rectangle. Locate the two short ends of your ear warmer. These will be joined together to create the twist.
Step 2: Fold the First End
Take one short end of the rectangle. Fold the end in half so the top and bottom corners meet. You should now have two layers of crochet fabric with a folded opening. For this tutorial, we’ll call this End A.
Step 3: Fold the Second End
Repeat the same folding process with the opposite short end. This will be End B. Both ends should now be folded in half, with two layers of fabric at each end.
Step 4: Interlock the Folded Ends
Bring End A and End B together. Carefully slide the folded edges into one another so the layers alternate. The four layers should be stacked in this order: A – B – A – B Make sure that all four raw edges are aligned evenly. This is what creates the beautiful twisted effect once the seam is sewn and turned outward.
Step 5: Sew the Seam
Thread the long yarn tail onto your yarn needle. Using small, secure stitches, sew across the aligned raw edges, passing through all four layers of crochet fabric. You may use a whipstitch or another secure hand-sewing technique. Make sure every layer is caught in the seam. Continue sewing until all four layers are firmly attached.
Step 6: Secure Your Yarn
Once you’ve finished sewing, secure your yarn. Weave in the remaining tail carefully and trim any excess yarn.
Step 7: Reveal the Twist!
Turn your crochet ear warmer right side out. Gently adjust the folded seam until the front twist sits neatly in the center.
And just like that, you’ve created the beautiful signature twist! Your Winter with a Twist Crochet Ear Warmer is complete!
Finishing Your Crochet Ear Warmer
Once the twisted seam has been completed, take a few moments to give your finished ear warmer a neat, professional appearance.
Check that the twist is centered.
Gently straighten the edges.
Make sure all yarn ends are securely woven in.
Inspect the seam to ensure all four layers are attached.
Try the ear warmer on to check the fit.
Adjust the twisted front so it sits comfortably.
If desired, lightly dampen the ear warmer and allow it to dry flat.
Avoid overstretching the fabric while blocking, since the design needs a little elasticity to stay comfortably in place.
Final Thoughts
And just like that, your Winter with a Twist Crochet Ear Warmer is complete!
I love how a few simple stitches and a little twist can create something so cozy and stylish! Whether you’re making one for yourself, gifting it to someone special, or creating matching ear warmers for the family, I hope you enjoy every stitch.
Don’t forget to experiment with different colors and make this design your own!
I’d love to see your finished ear warmers! Share your creations with the JBC Crochet Designs community, and be sure to explore more cozy crochet patterns here on the blog.
Until next time, stay cozy, keep creating, and remember — sometimes all you need is a little twist!
Happy Crocheting!
Brittany ♡
JBC Crochet Designs
You may Also like
we’ve got a community!
friends! Join our group to post
pictures and ask all your pattern
support questions.
-
Yes! Although the finished ear warmer has a beautifully textured appearance, the stitch pattern is simple enough for confident beginners.
If you know how to chain, work half double crochet, and make slip stitches, you can learn the remaining techniques fairly quickly.
-
No. This pattern is worked flat in rows to create a rectangle. The ends are then sewn together using a special folding technique to create the twist.
-
Absolutely! Simply add additional alternating pattern rows until you’ve reached your preferred width. Finish with a loose slip-stitch row.
-
Yes. Increase the number of foundation stitches to create a longer rectangle. Always measure your project before seaming.
-
You can experiment with other yarn weights, but doing so will change your gauge, finished measurements, and possibly the thickness of the twist. For the closest results, use a medium #4 worsted-weight yarn.
-
Choose a yarn with good shape retention and avoid overstretching the fabric during blocking or washing. Follow the care instructions on your yarn label.
-
Blocking is optional. A little gentle shaping is usually enough to give the finished ear warmer a neat appearance.
-
Proper care will help keep your handmade accessory looking beautiful.
Always follow the care instructions provided on your chosen yarn label.
For many acrylic yarns, gentle washing and laying flat to dry can help preserve the stitch texture and shape.
Avoid excessive stretching, especially around the twisted seam.
Store your finished ear warmer folded or laid flat when it isn’t being worn.
Copyright & Pattern Use
This pattern and its photographs remain the property of JusBeeCreations Crochet Designs. The original PDF permits makers to sell finished items created from the pattern while requesting that JusBeeCreations be credited as the designer; the pattern text and photographs may not be copied or reproduced for resale.
Fall Y'all Table Runner .pdf
You may sell finished table runners made from this pattern. Please credit JusBeeCreations Crochet Designs as the pattern designer when possible.
Do not copy, redistribute, reproduce, translate for distribution, or sell this written pattern or its photographs.

Hello, crochet friends! ♡
Meet Brittany
Hi! I’m Brittany, the designer and maker behind JusBeeCreations Crochet Designs. I love creating crochet patterns that are beautiful, approachable, and fun to make.
Here you’ll find cozy crochet projects, seasonal designs, wearable pieces, home décor, and inspiration to help you enjoy every part of your crochet journey.
Let’s crochet together! ♡